Reed Guillotine
Reed Guillotine for Oboe
Description
The reed guillotine is a tool used for cutting the tip of the reed to the desired length. The OpenReed reed guillotine has the following features:
- A double-blade design for clean and effortless cutting.
- Replaceable blades made from inexpensive, widely available standard utility blades, allowing easy and low-cost replacement when they become dull.
- A dual-end reed holder that accommodates different types of reeds, including various oboe reed staples and English horn reeds.
Build Guide
Bill of Materials
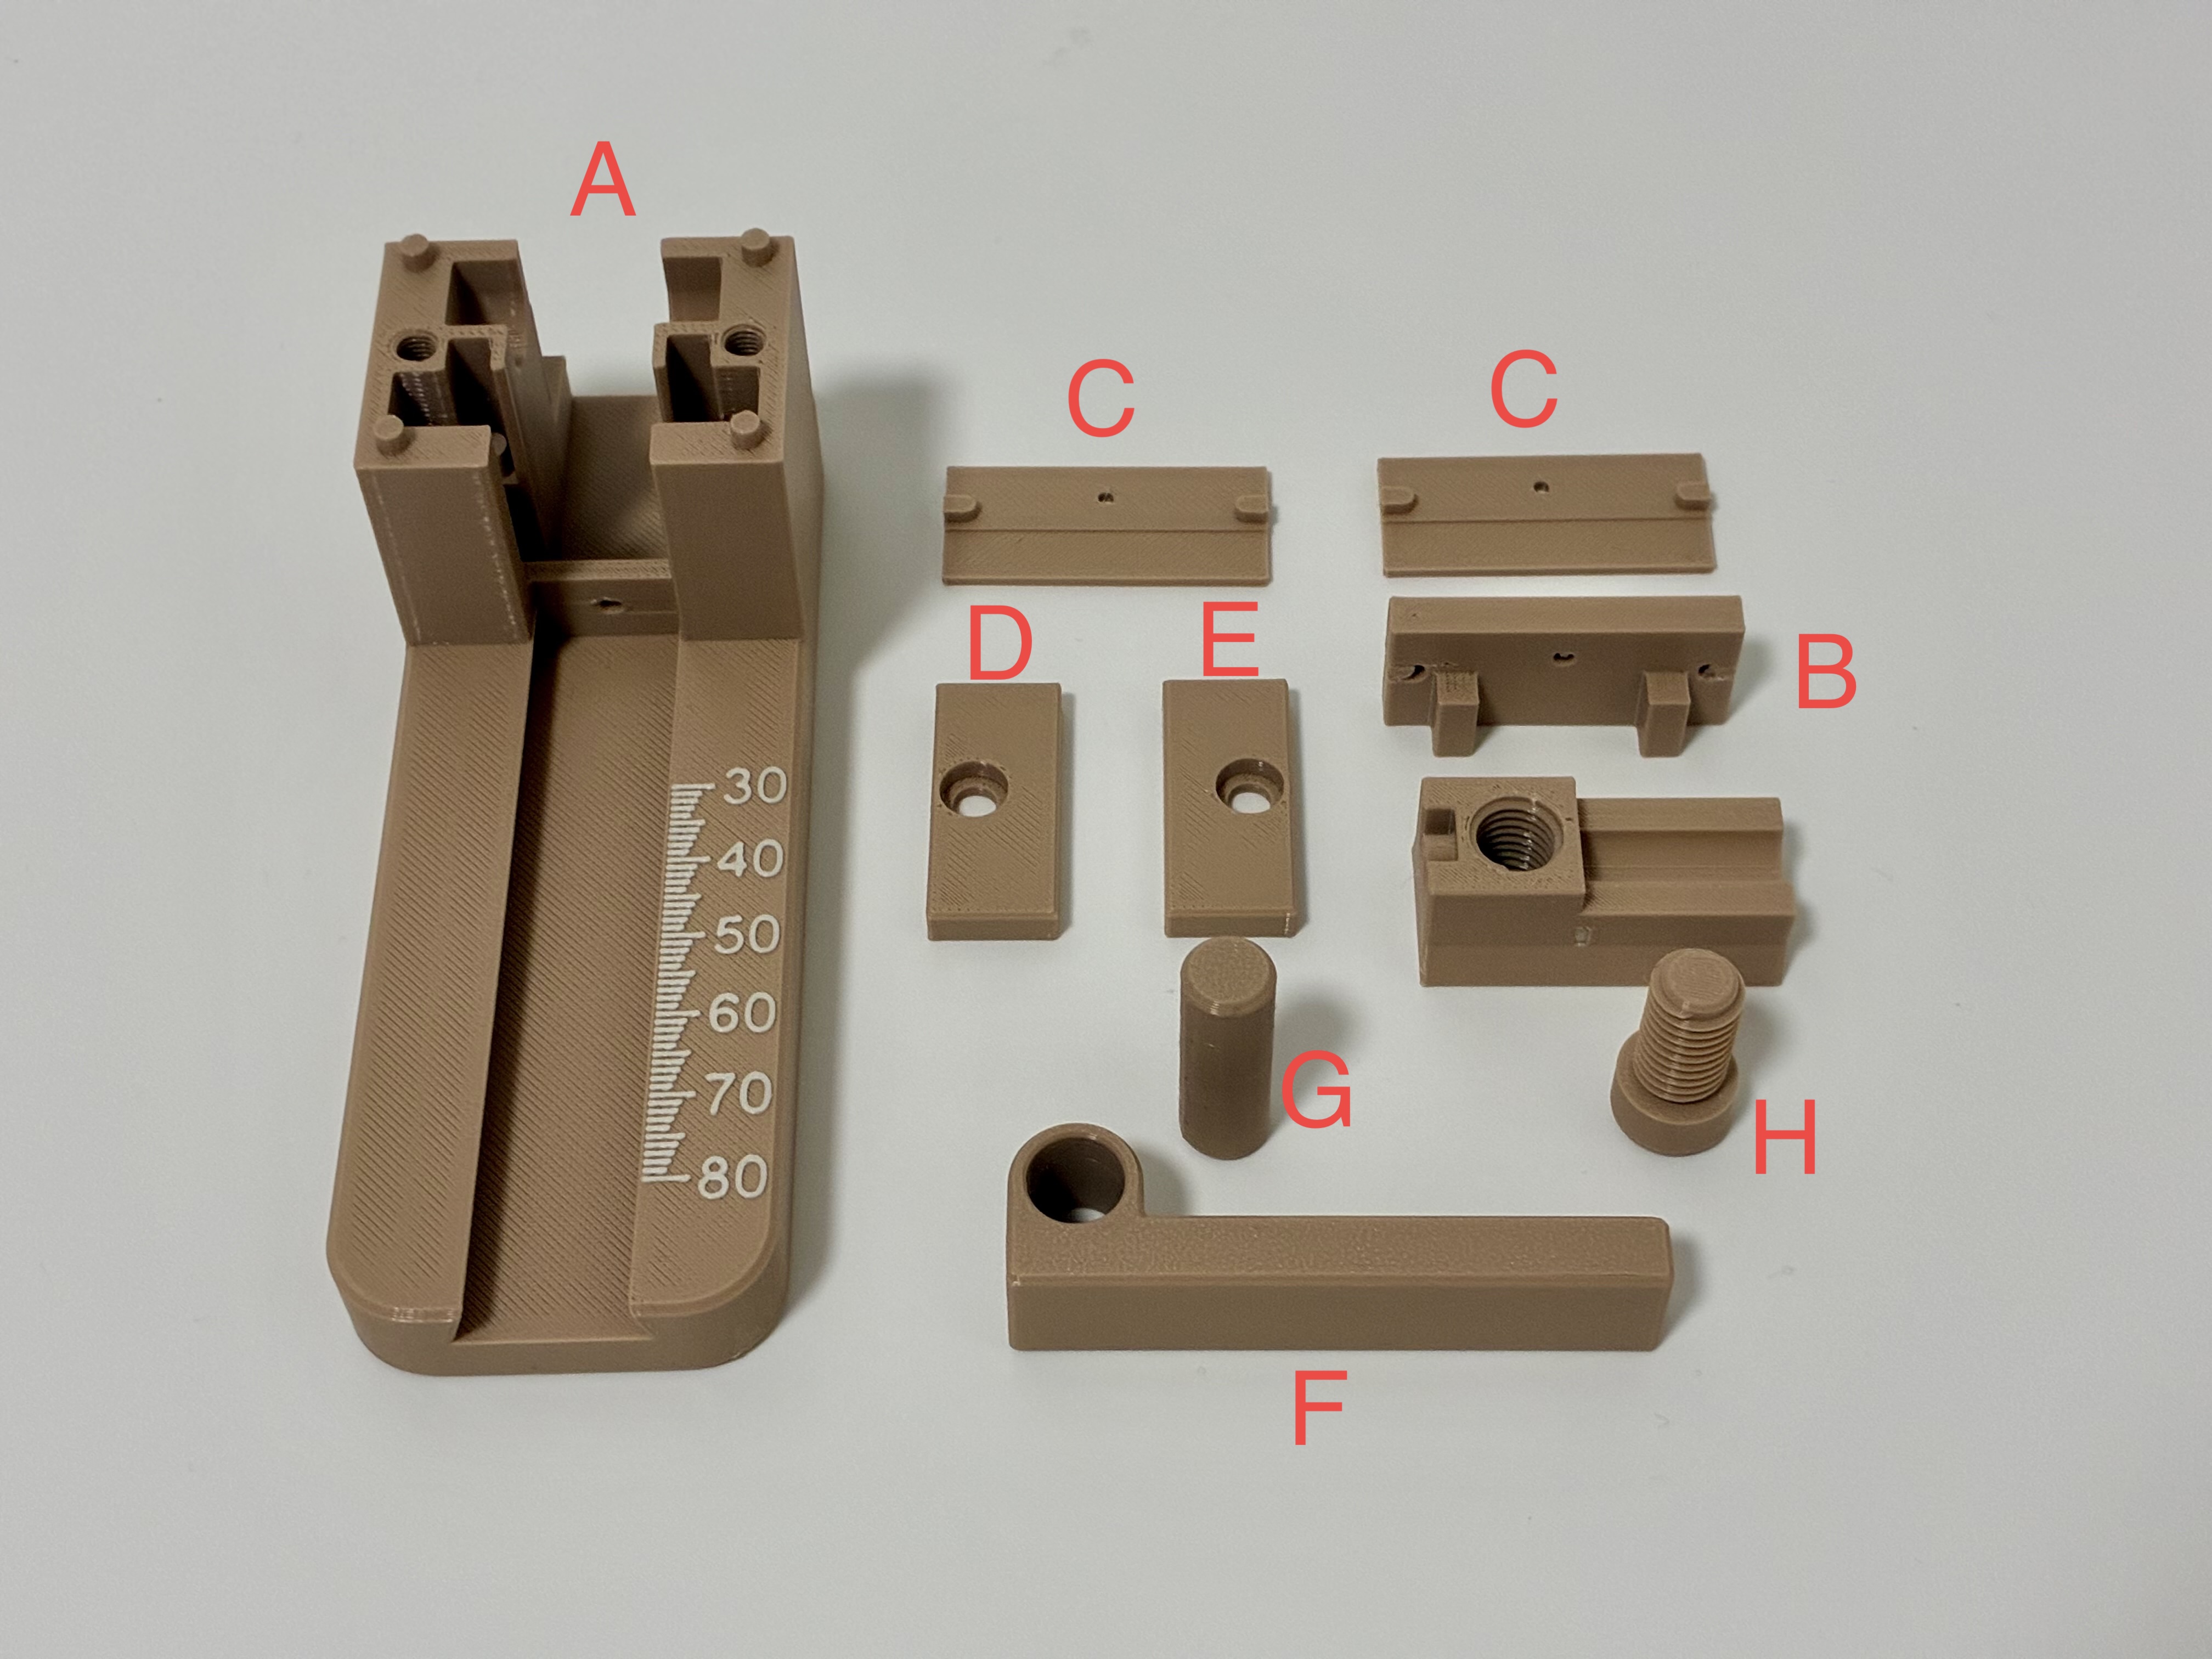
Printed Parts
- Main body $\times$ 1 (A)
- Blade holder $\times$ 1 (B)
- Blade clamp $\times$ 2 (C)
- Left lid $\times$ 1 (D)
- Right lid $\times$ 1 (E)
- Handle $\times$ 1 (F)
- Handle axle $\times$ 1 (G)
- Reed holder $\times$ 1 (H)
- Reed holder screw $\times$ 1 (I)
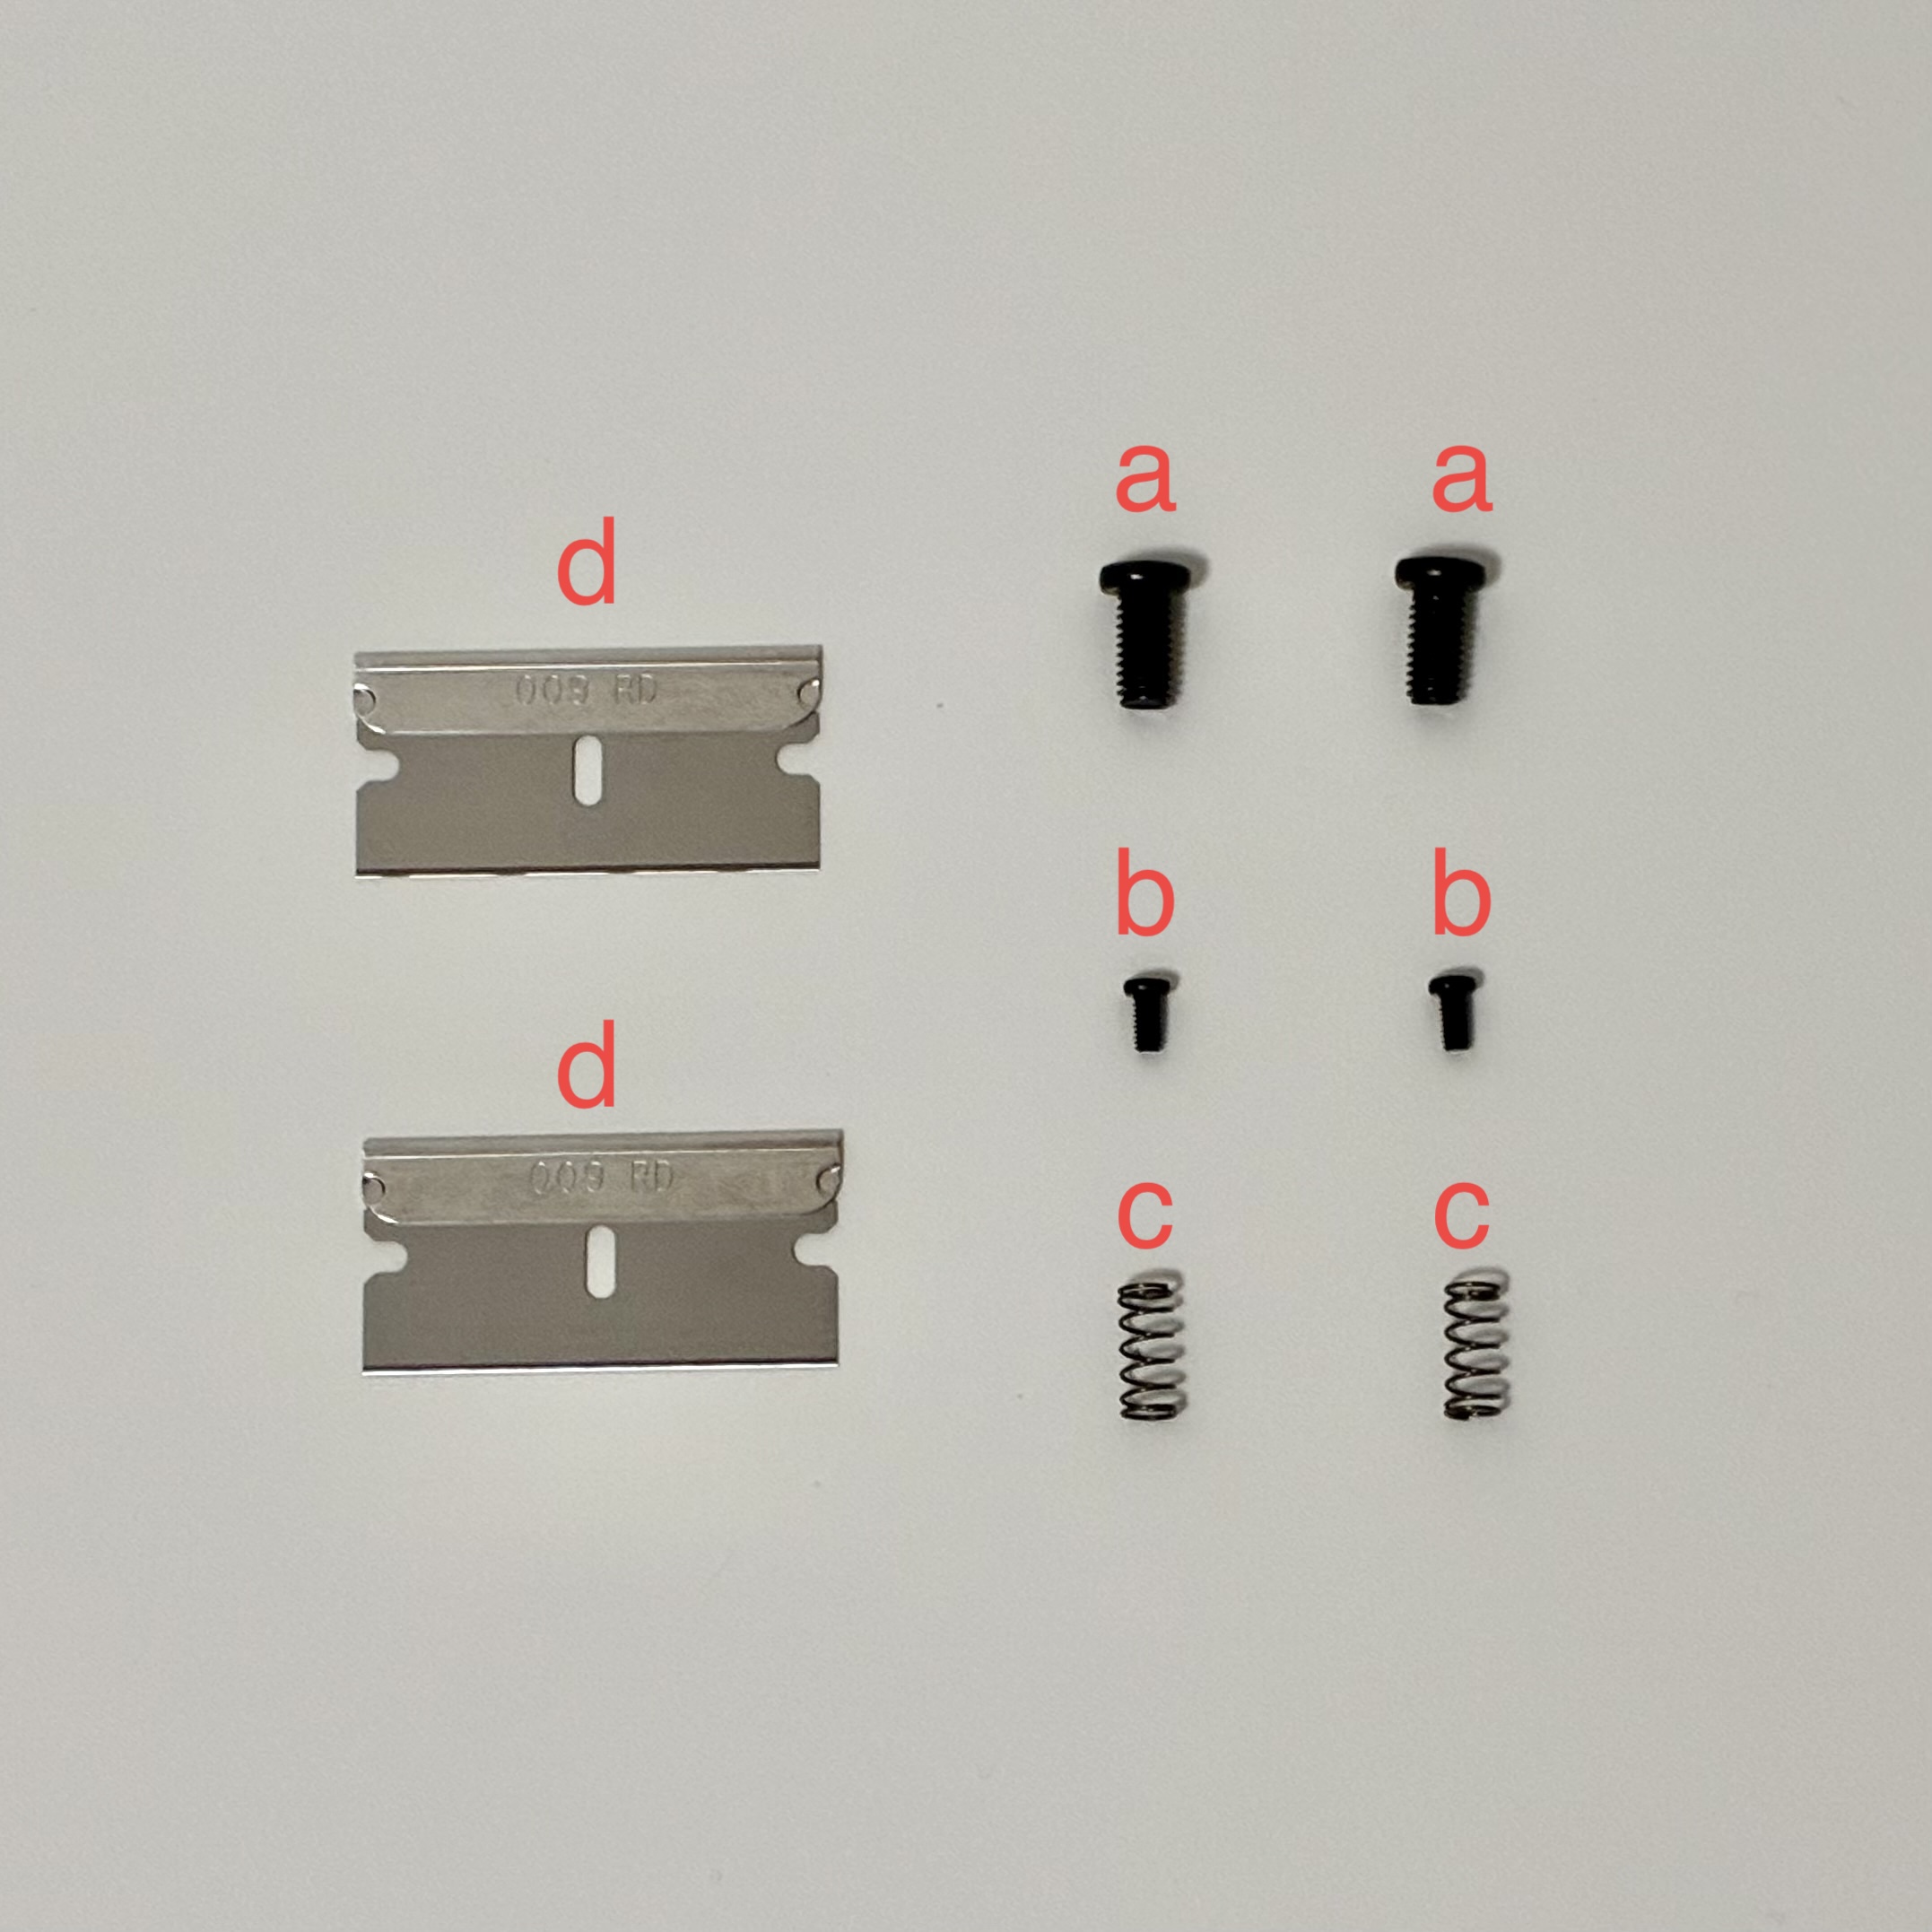
Standard Hardware
- M5*10mm Screw $\times$ 2 (a)
- M2.5*5mm Screw $\times$ 2 (b)
- 0.4mm*4.5mm*10mm (wire diameter * outer diameter * length) Spring $\times$ 2 (c)
- 009 RD Blade $\times$ 2 (d)
Auxiliary Tools
- A screwdriver
- A tweezer
Printing the Parts
Generating 3D Files
| Source | Description |
|---|---|
| GitHub Repository | Generate the 3D file from source. You may need to install OpenSCAD and Python on your system. |
| MakerWorld Global | Download the pre-generated .3mf file on MakerWorld Global webpage. |
| MakerWorld CN | Download the pre-generated .3mf file on MakerWorld CN webpage. |
Printing Tips
- Use a layer height lower than 0.12mm for the blade holder, blade clamps, and the reed holder to ensure precision.
- Use support for the blade holder and the reed holder.
- Use multi-color printing if available to make the scale markings more visible.
- PETG is recommended for better durability.
Assembly
You may follow the steps below to assemble the reed guillotine. The assembly process is straightforward and flexible, and you may adjust the order of the steps according to your preference.
Step 1: Install the Bottom Blade
Select one of the two 009 RD blades as the bottom blade, and plug it into one of the blade clamps. 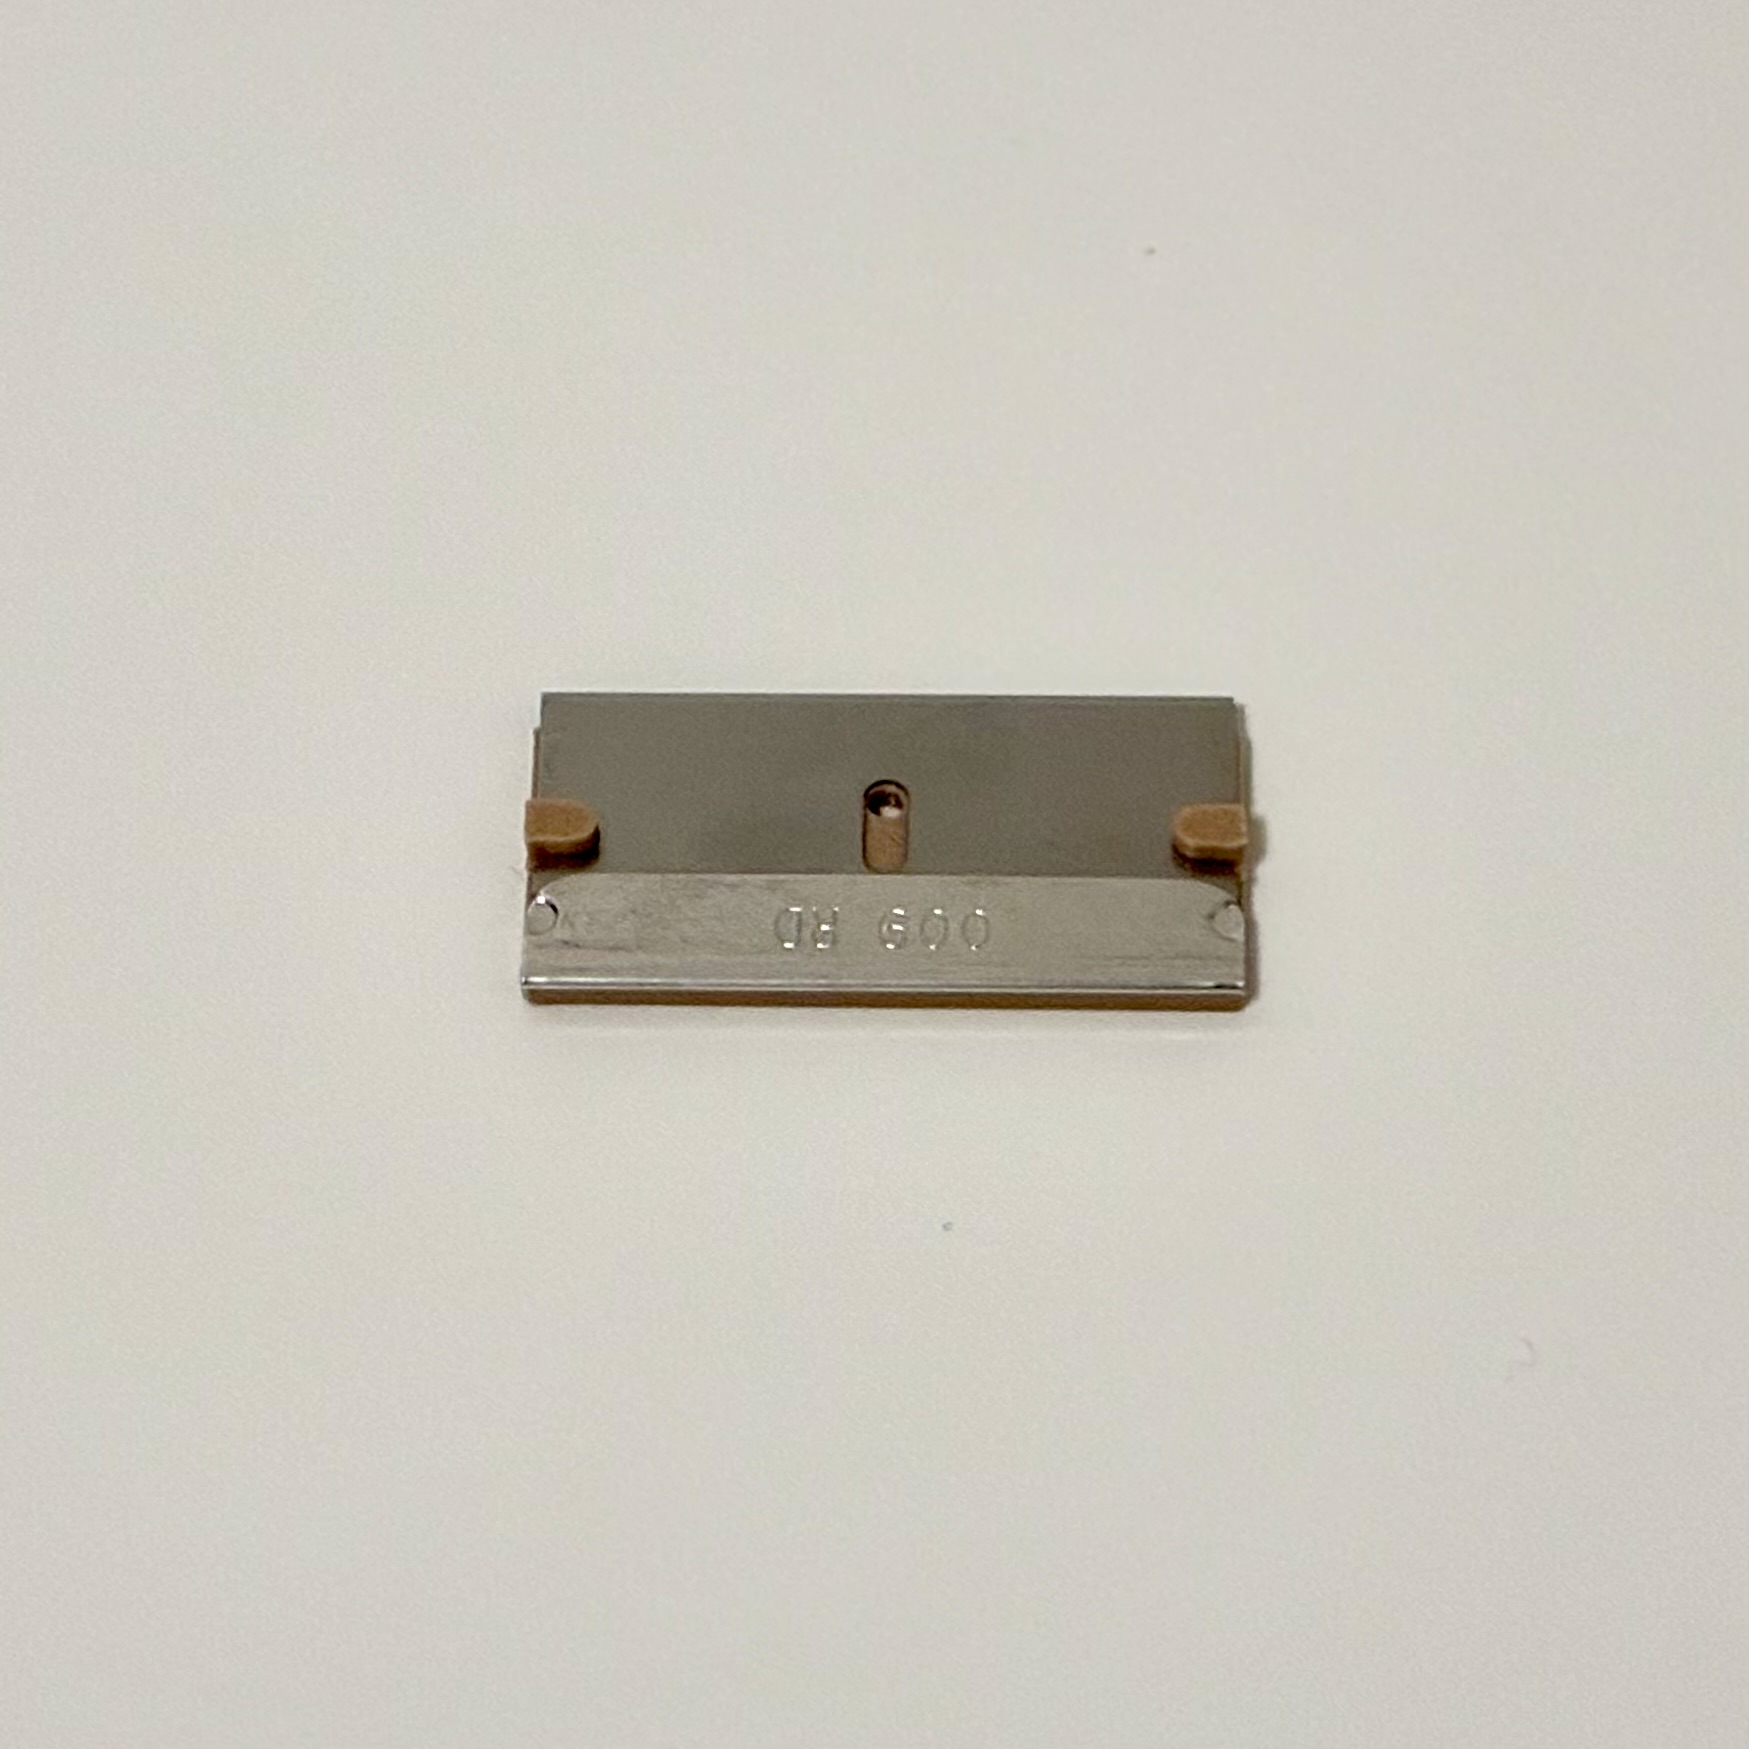
Plug the blade clamp and the blade into the main body, you may need a tweezer to connect the two parts more easily. 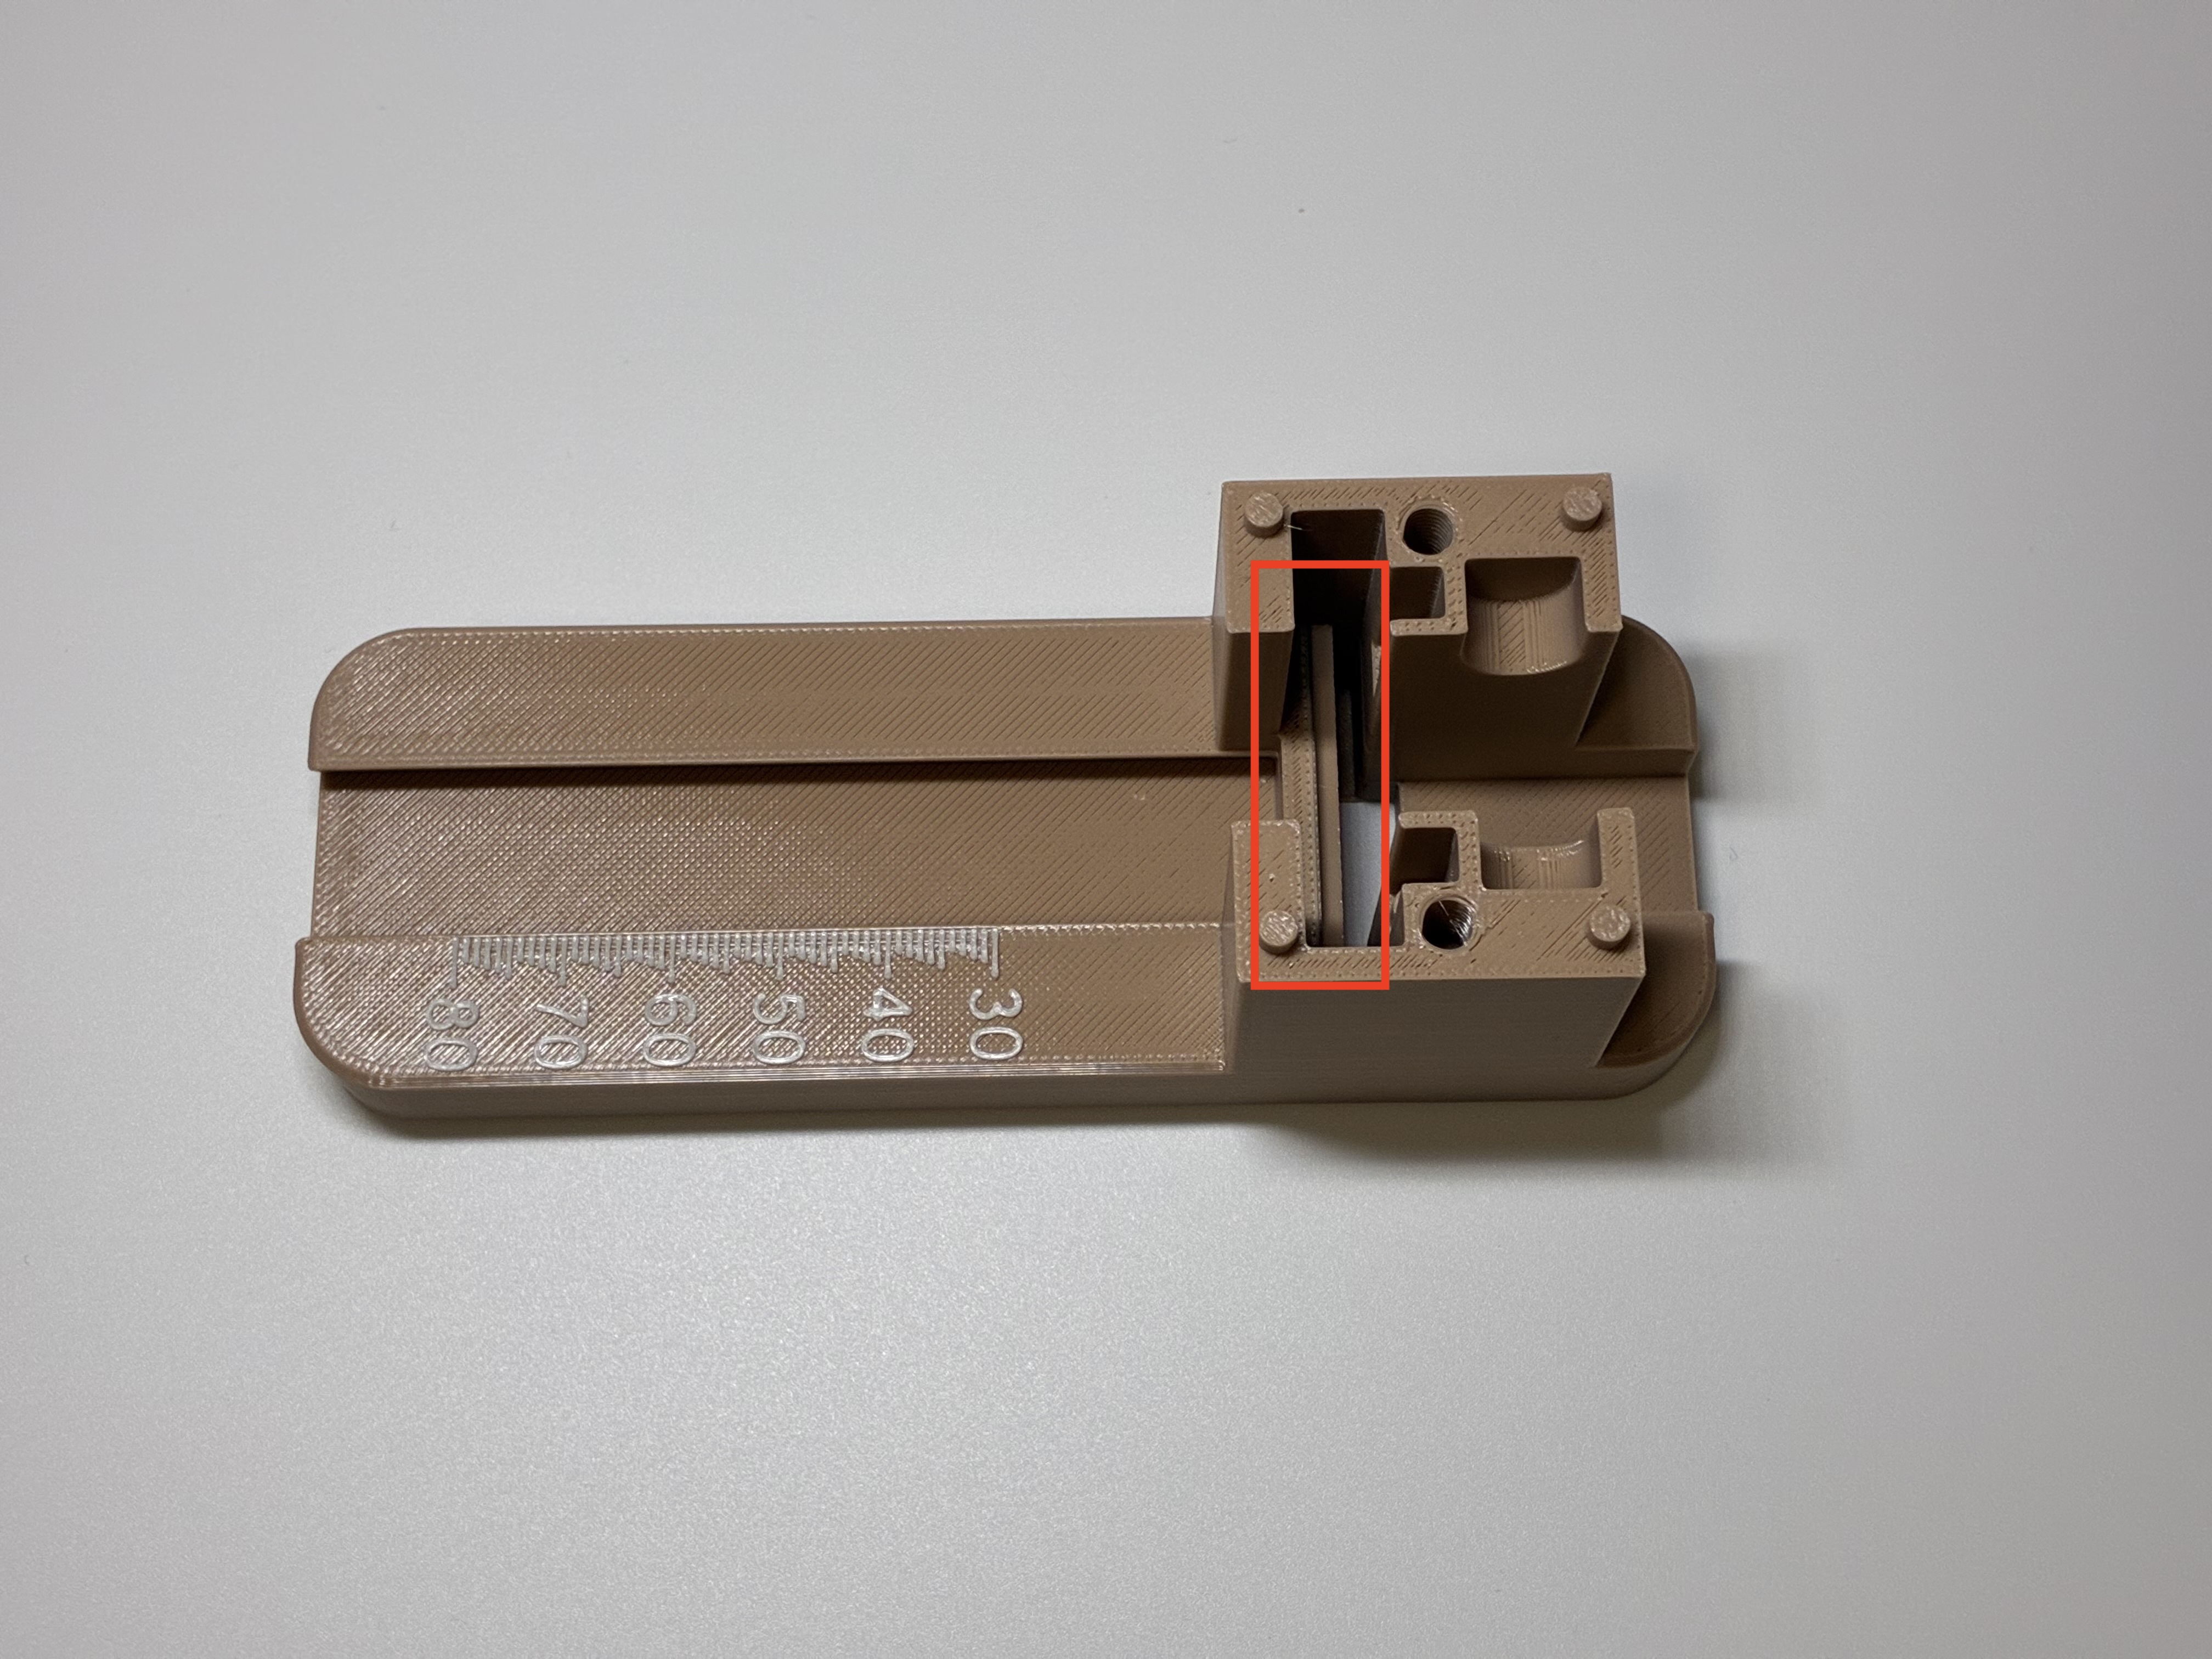
Secure it with an M2.5*5mm screw, and be careful not to overtighten it, as the plastic has limited strength. You will need a screw driver for this step. 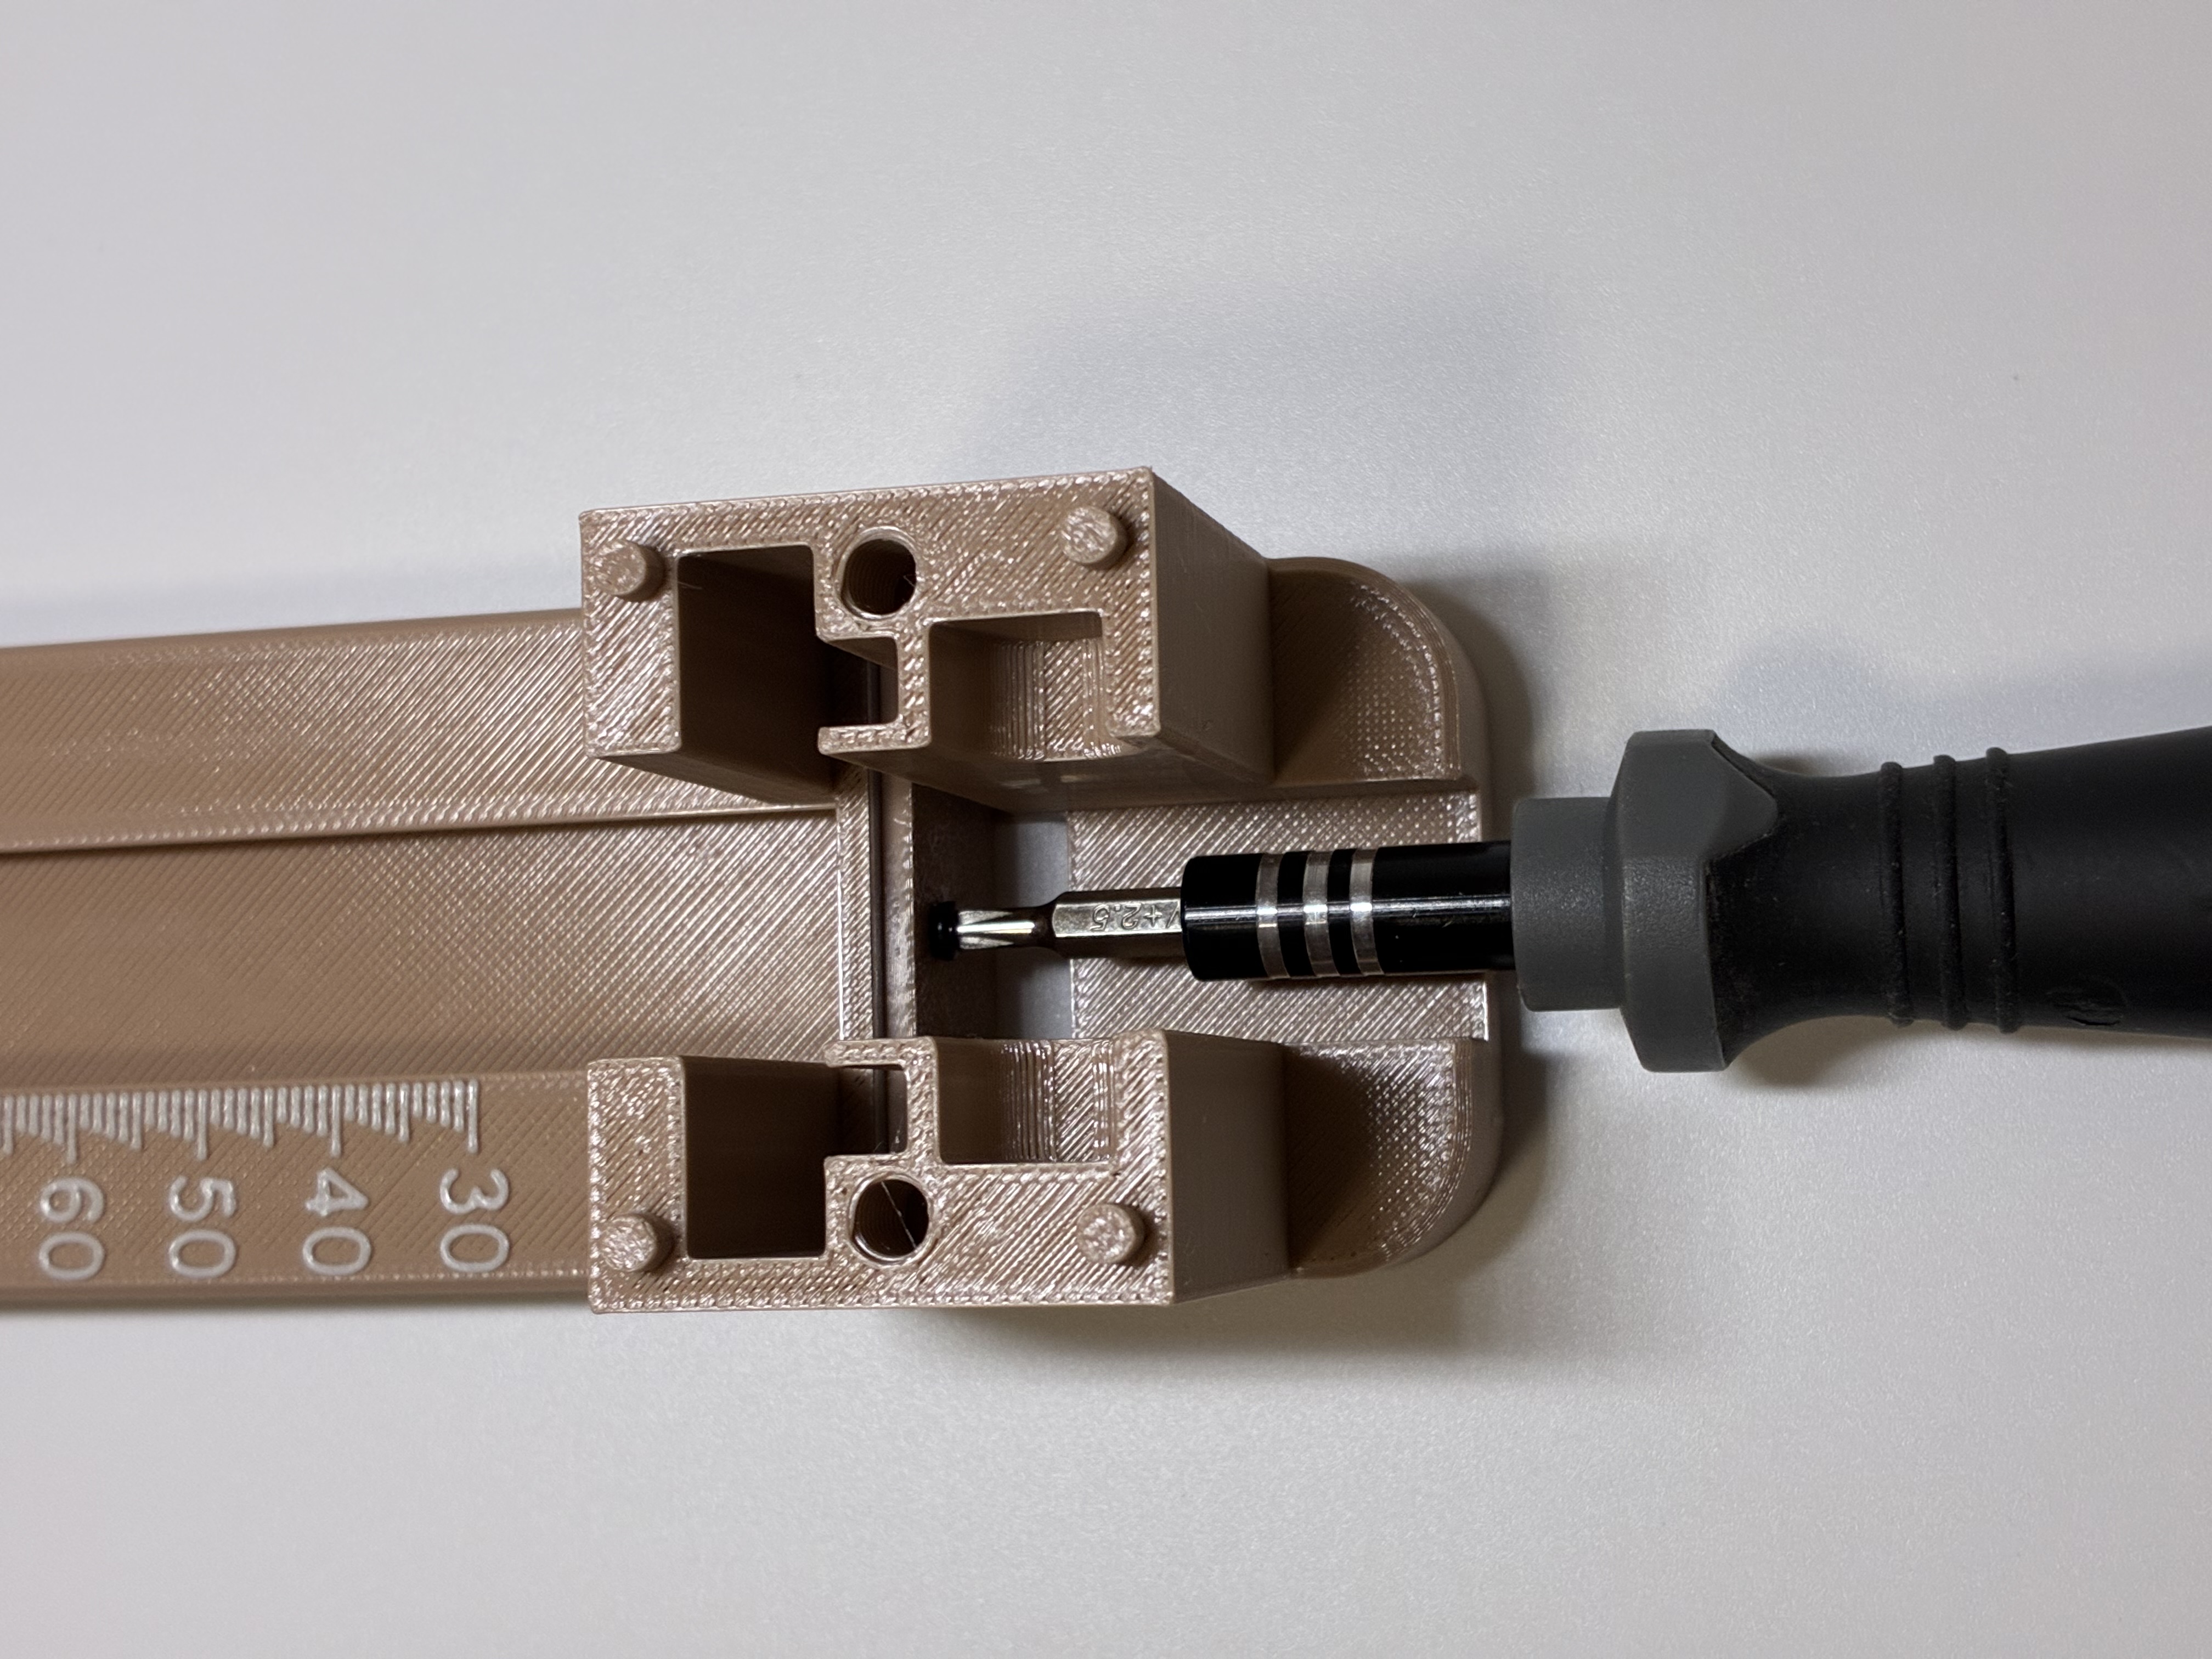
Step 2: Install the Top Blade
Remove the support material from the blade holder. 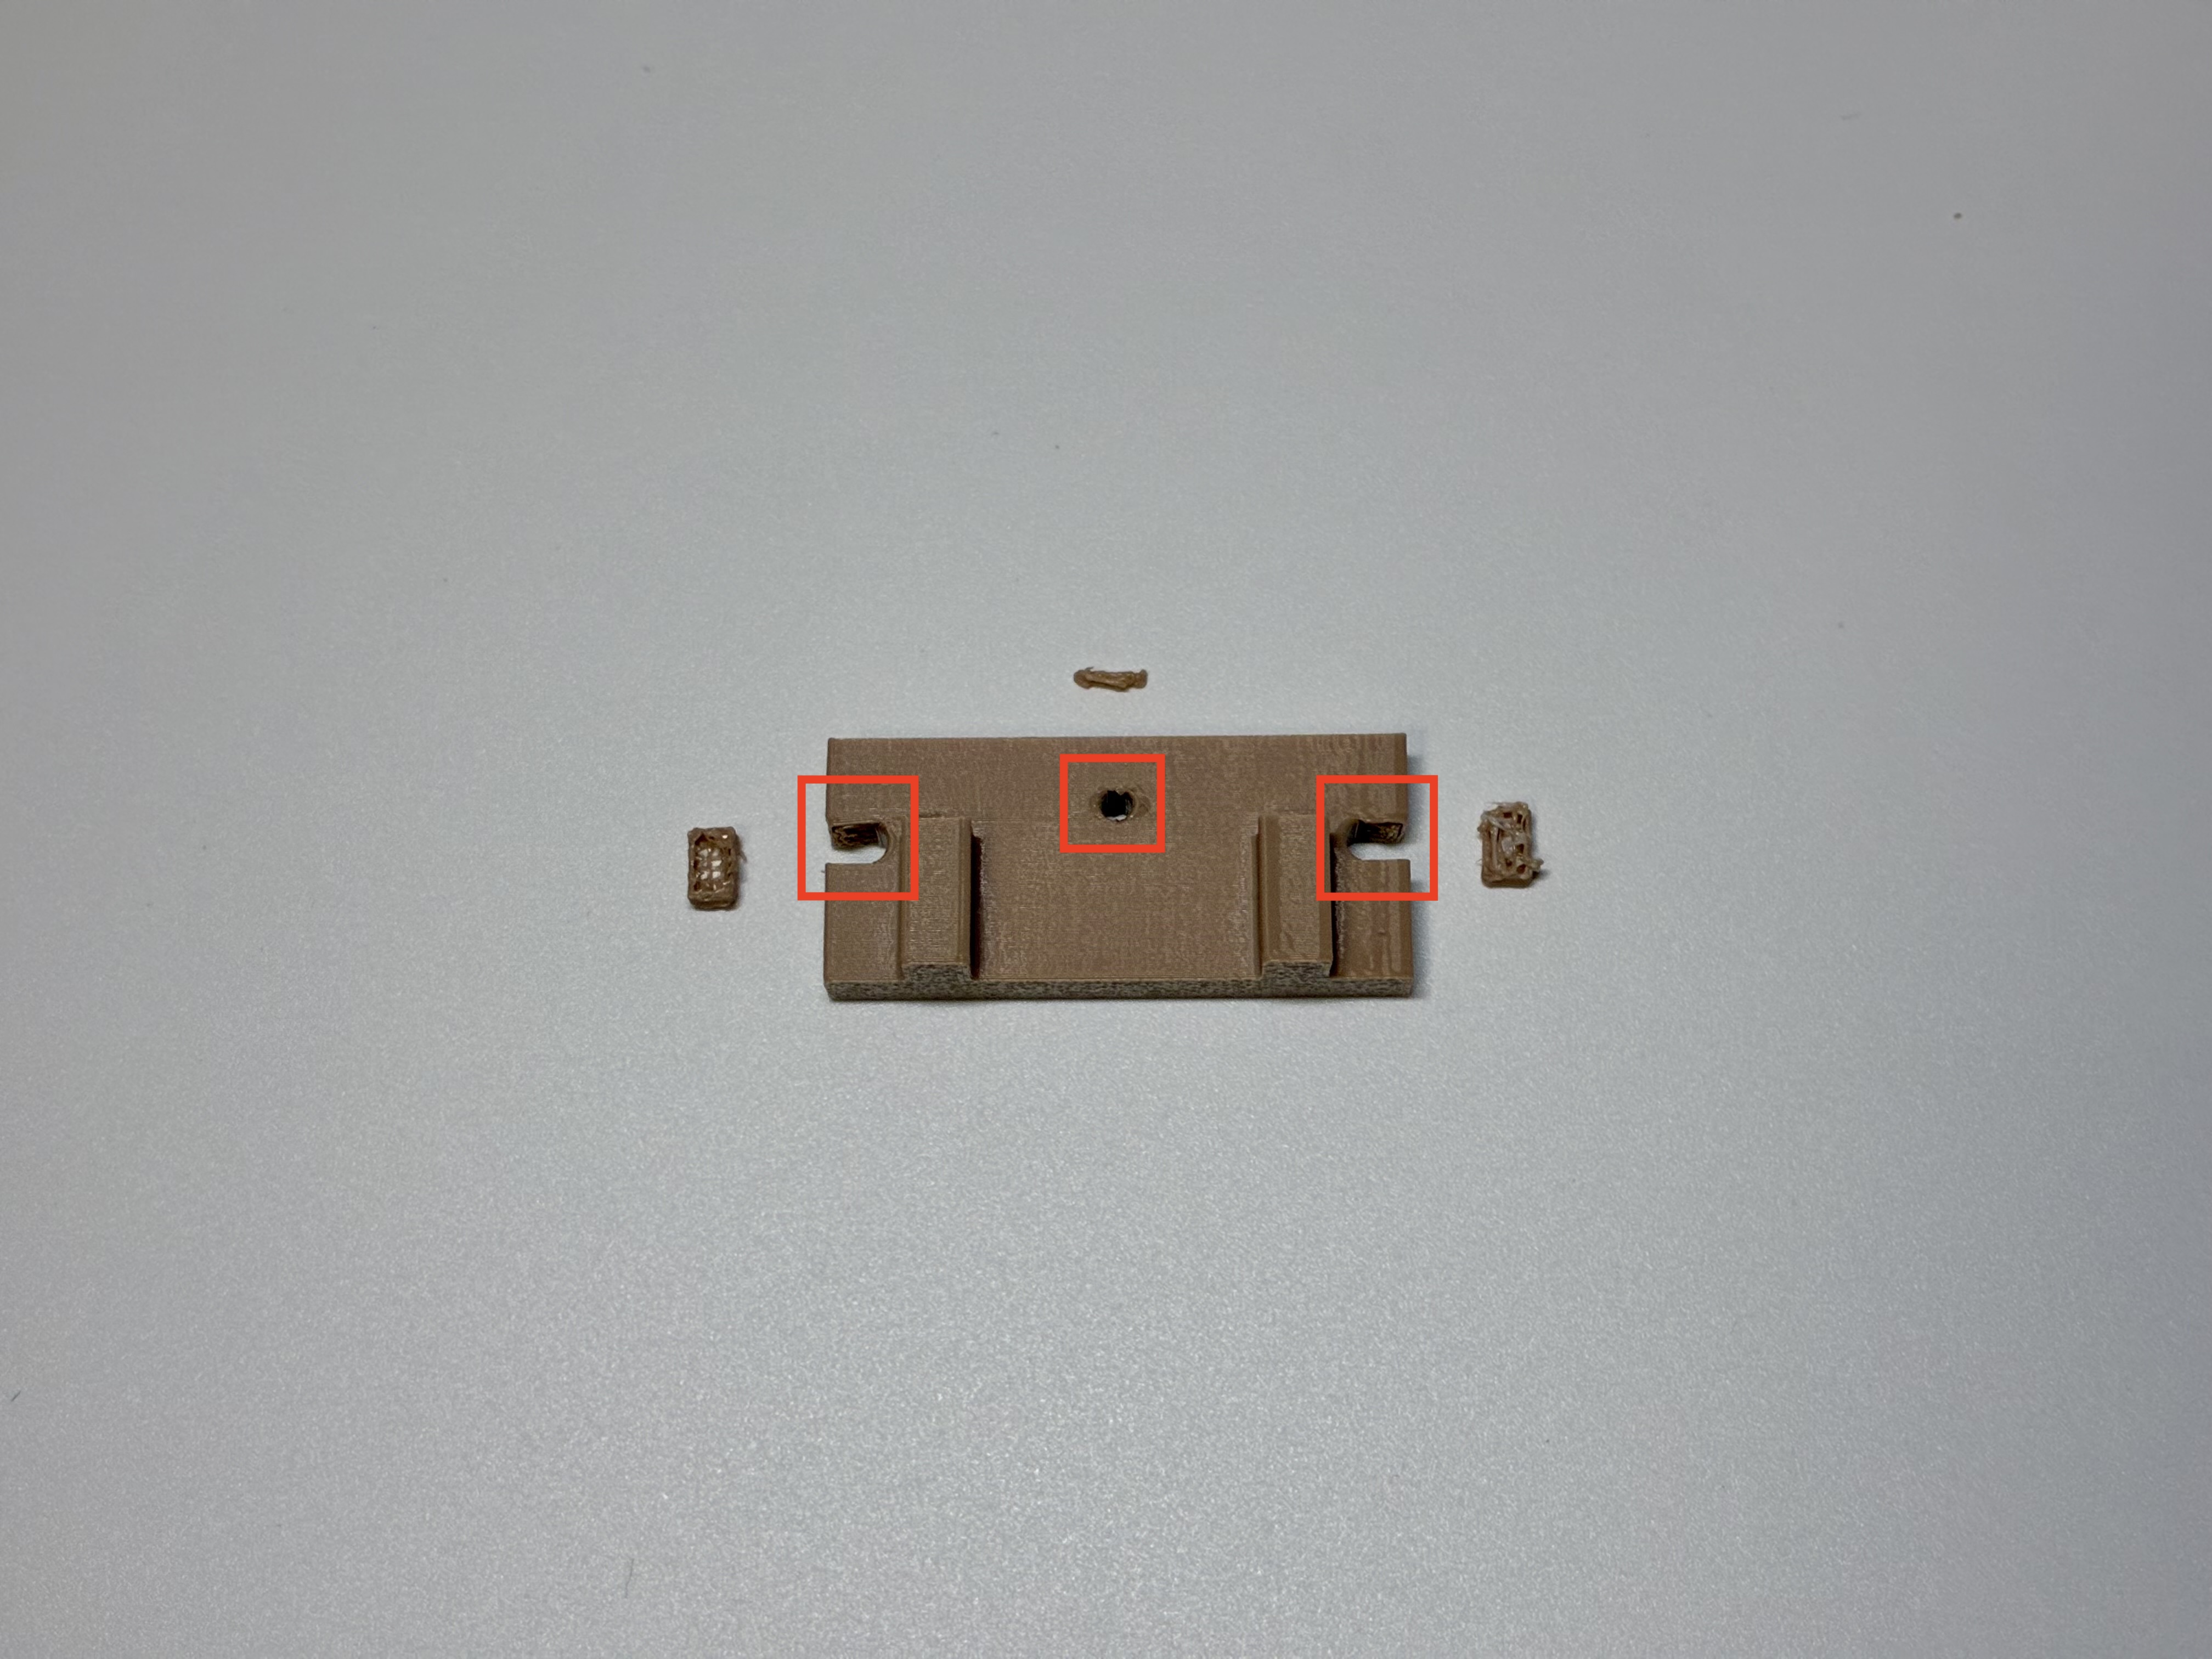
Similarly with Step 1, plug the other 009 RD blade into the other blade clamp and plug them into the blade holder. You can secure it with an M2.5*5mm screw now, but it is recommended to secure it later, as the connected part is not easy to hold. Be aware of your fingers. 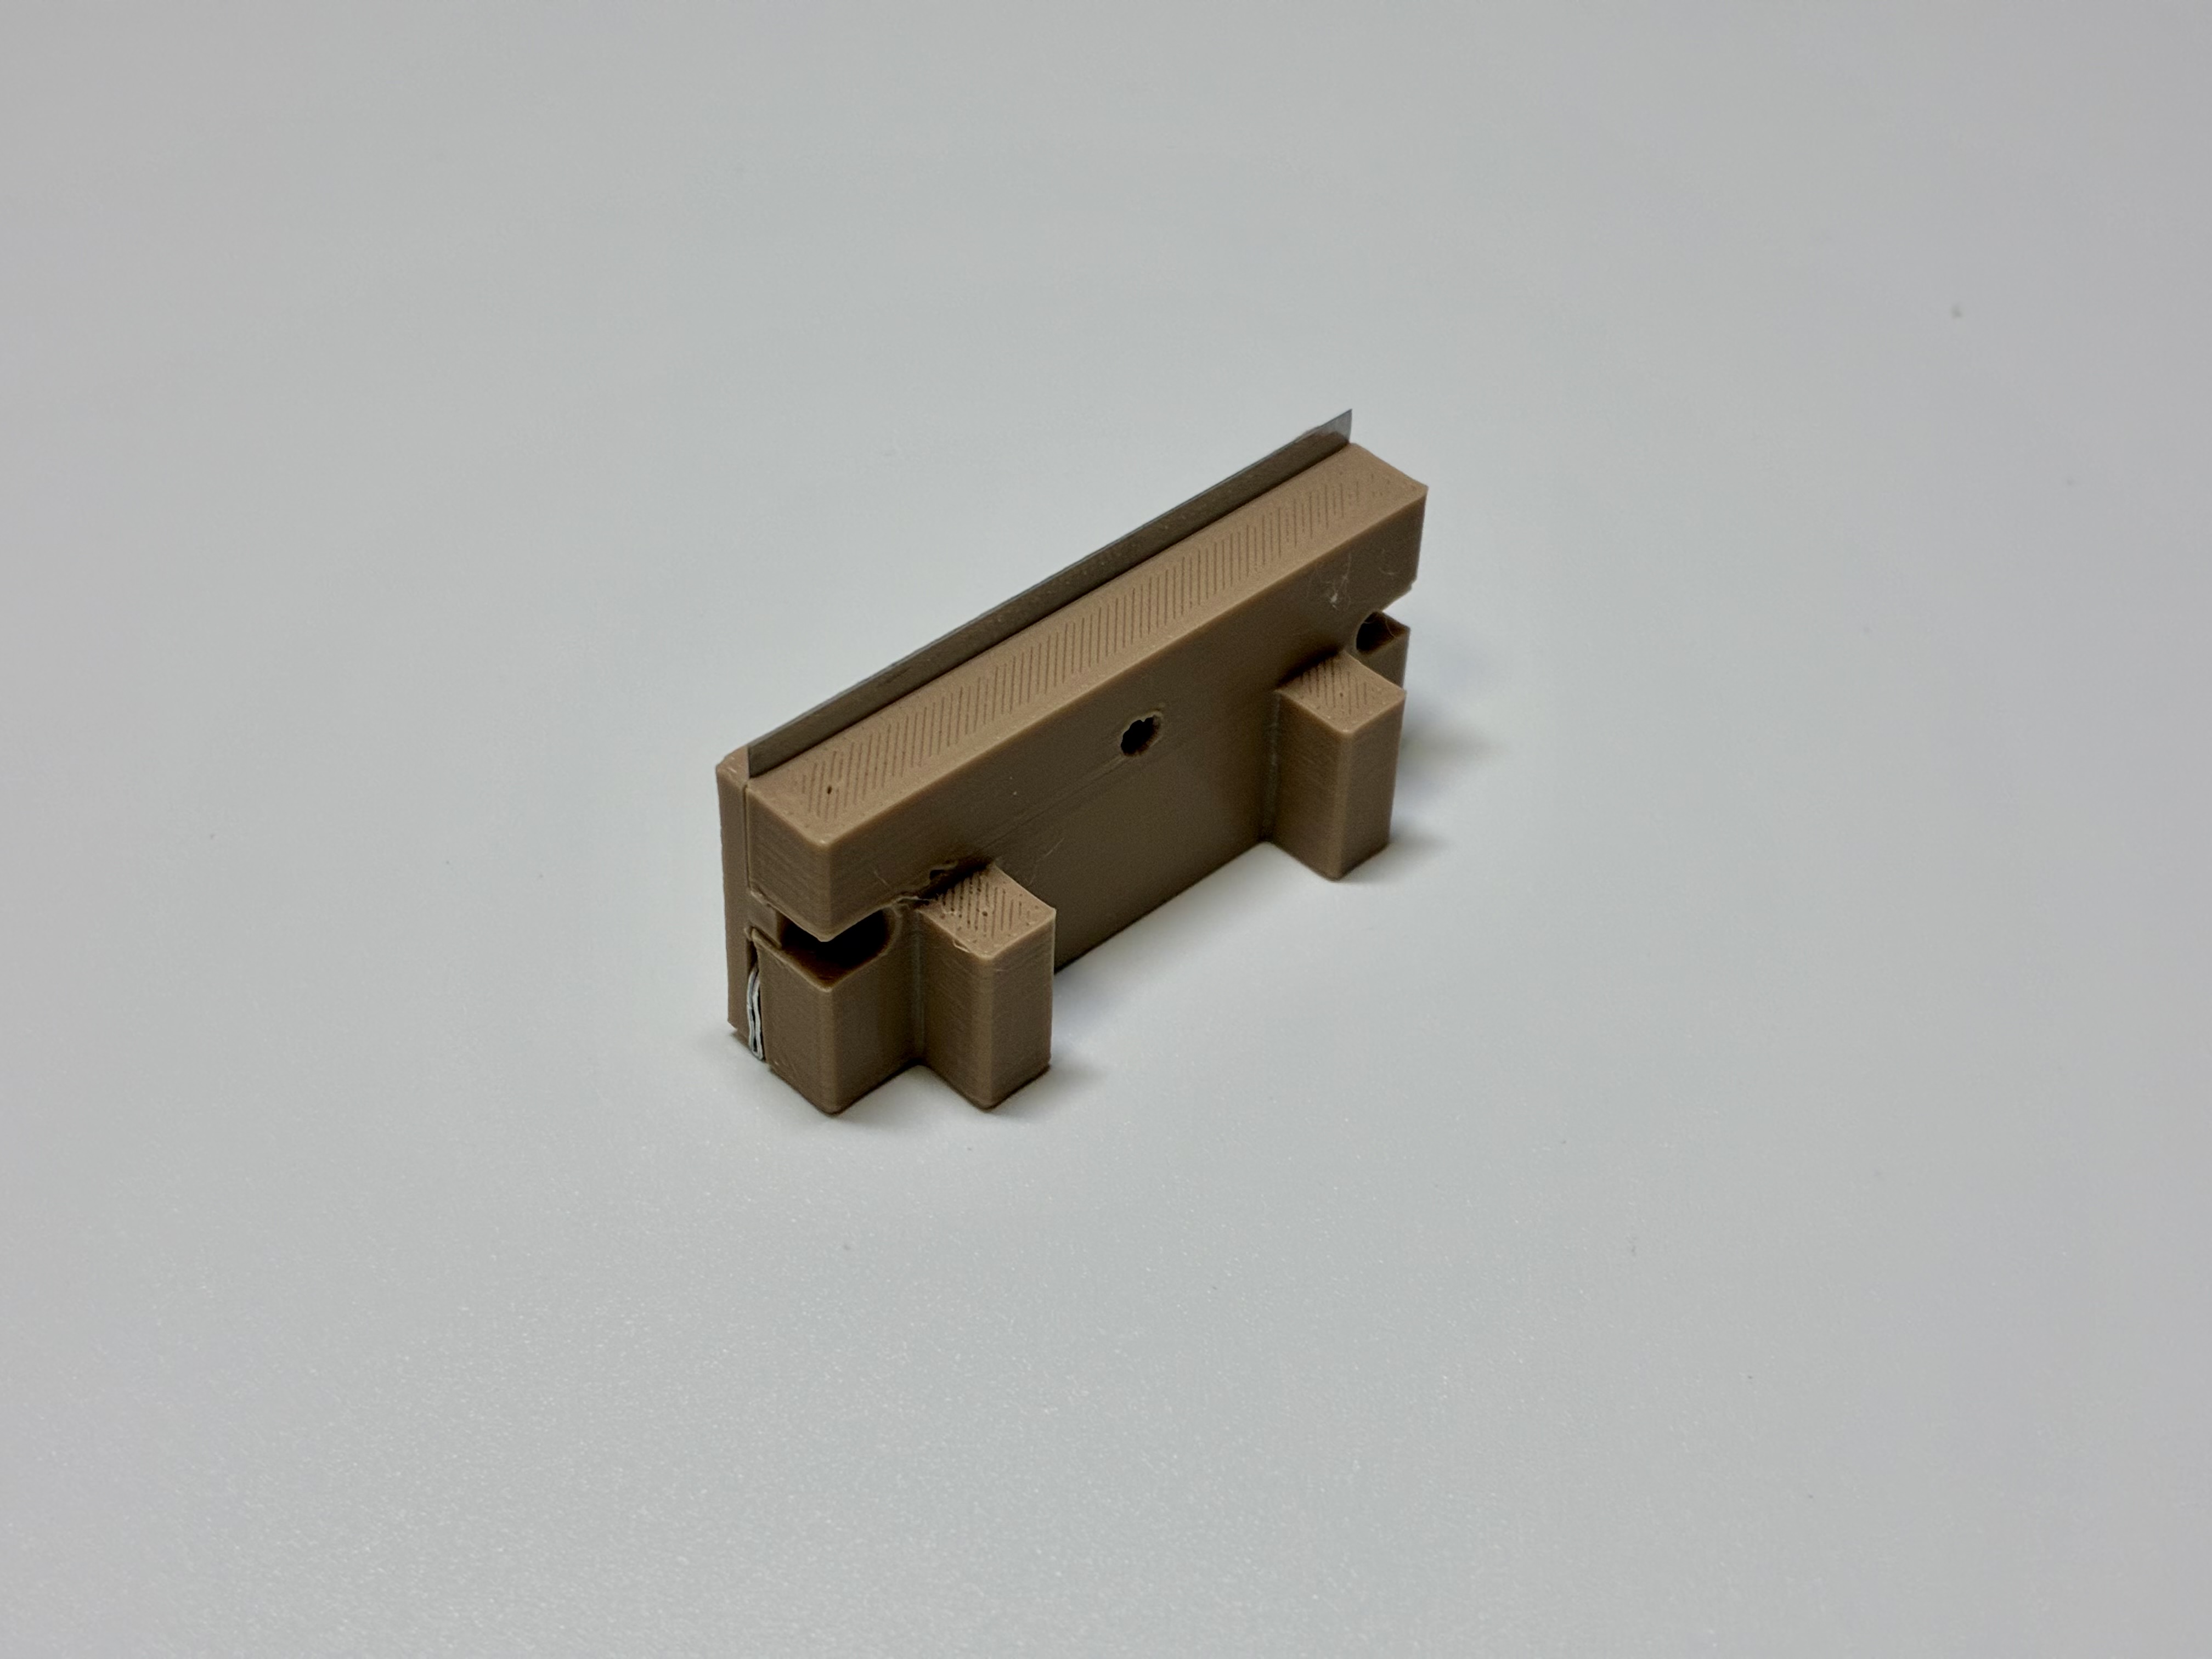
Step 3: Install the Handle and the Lids
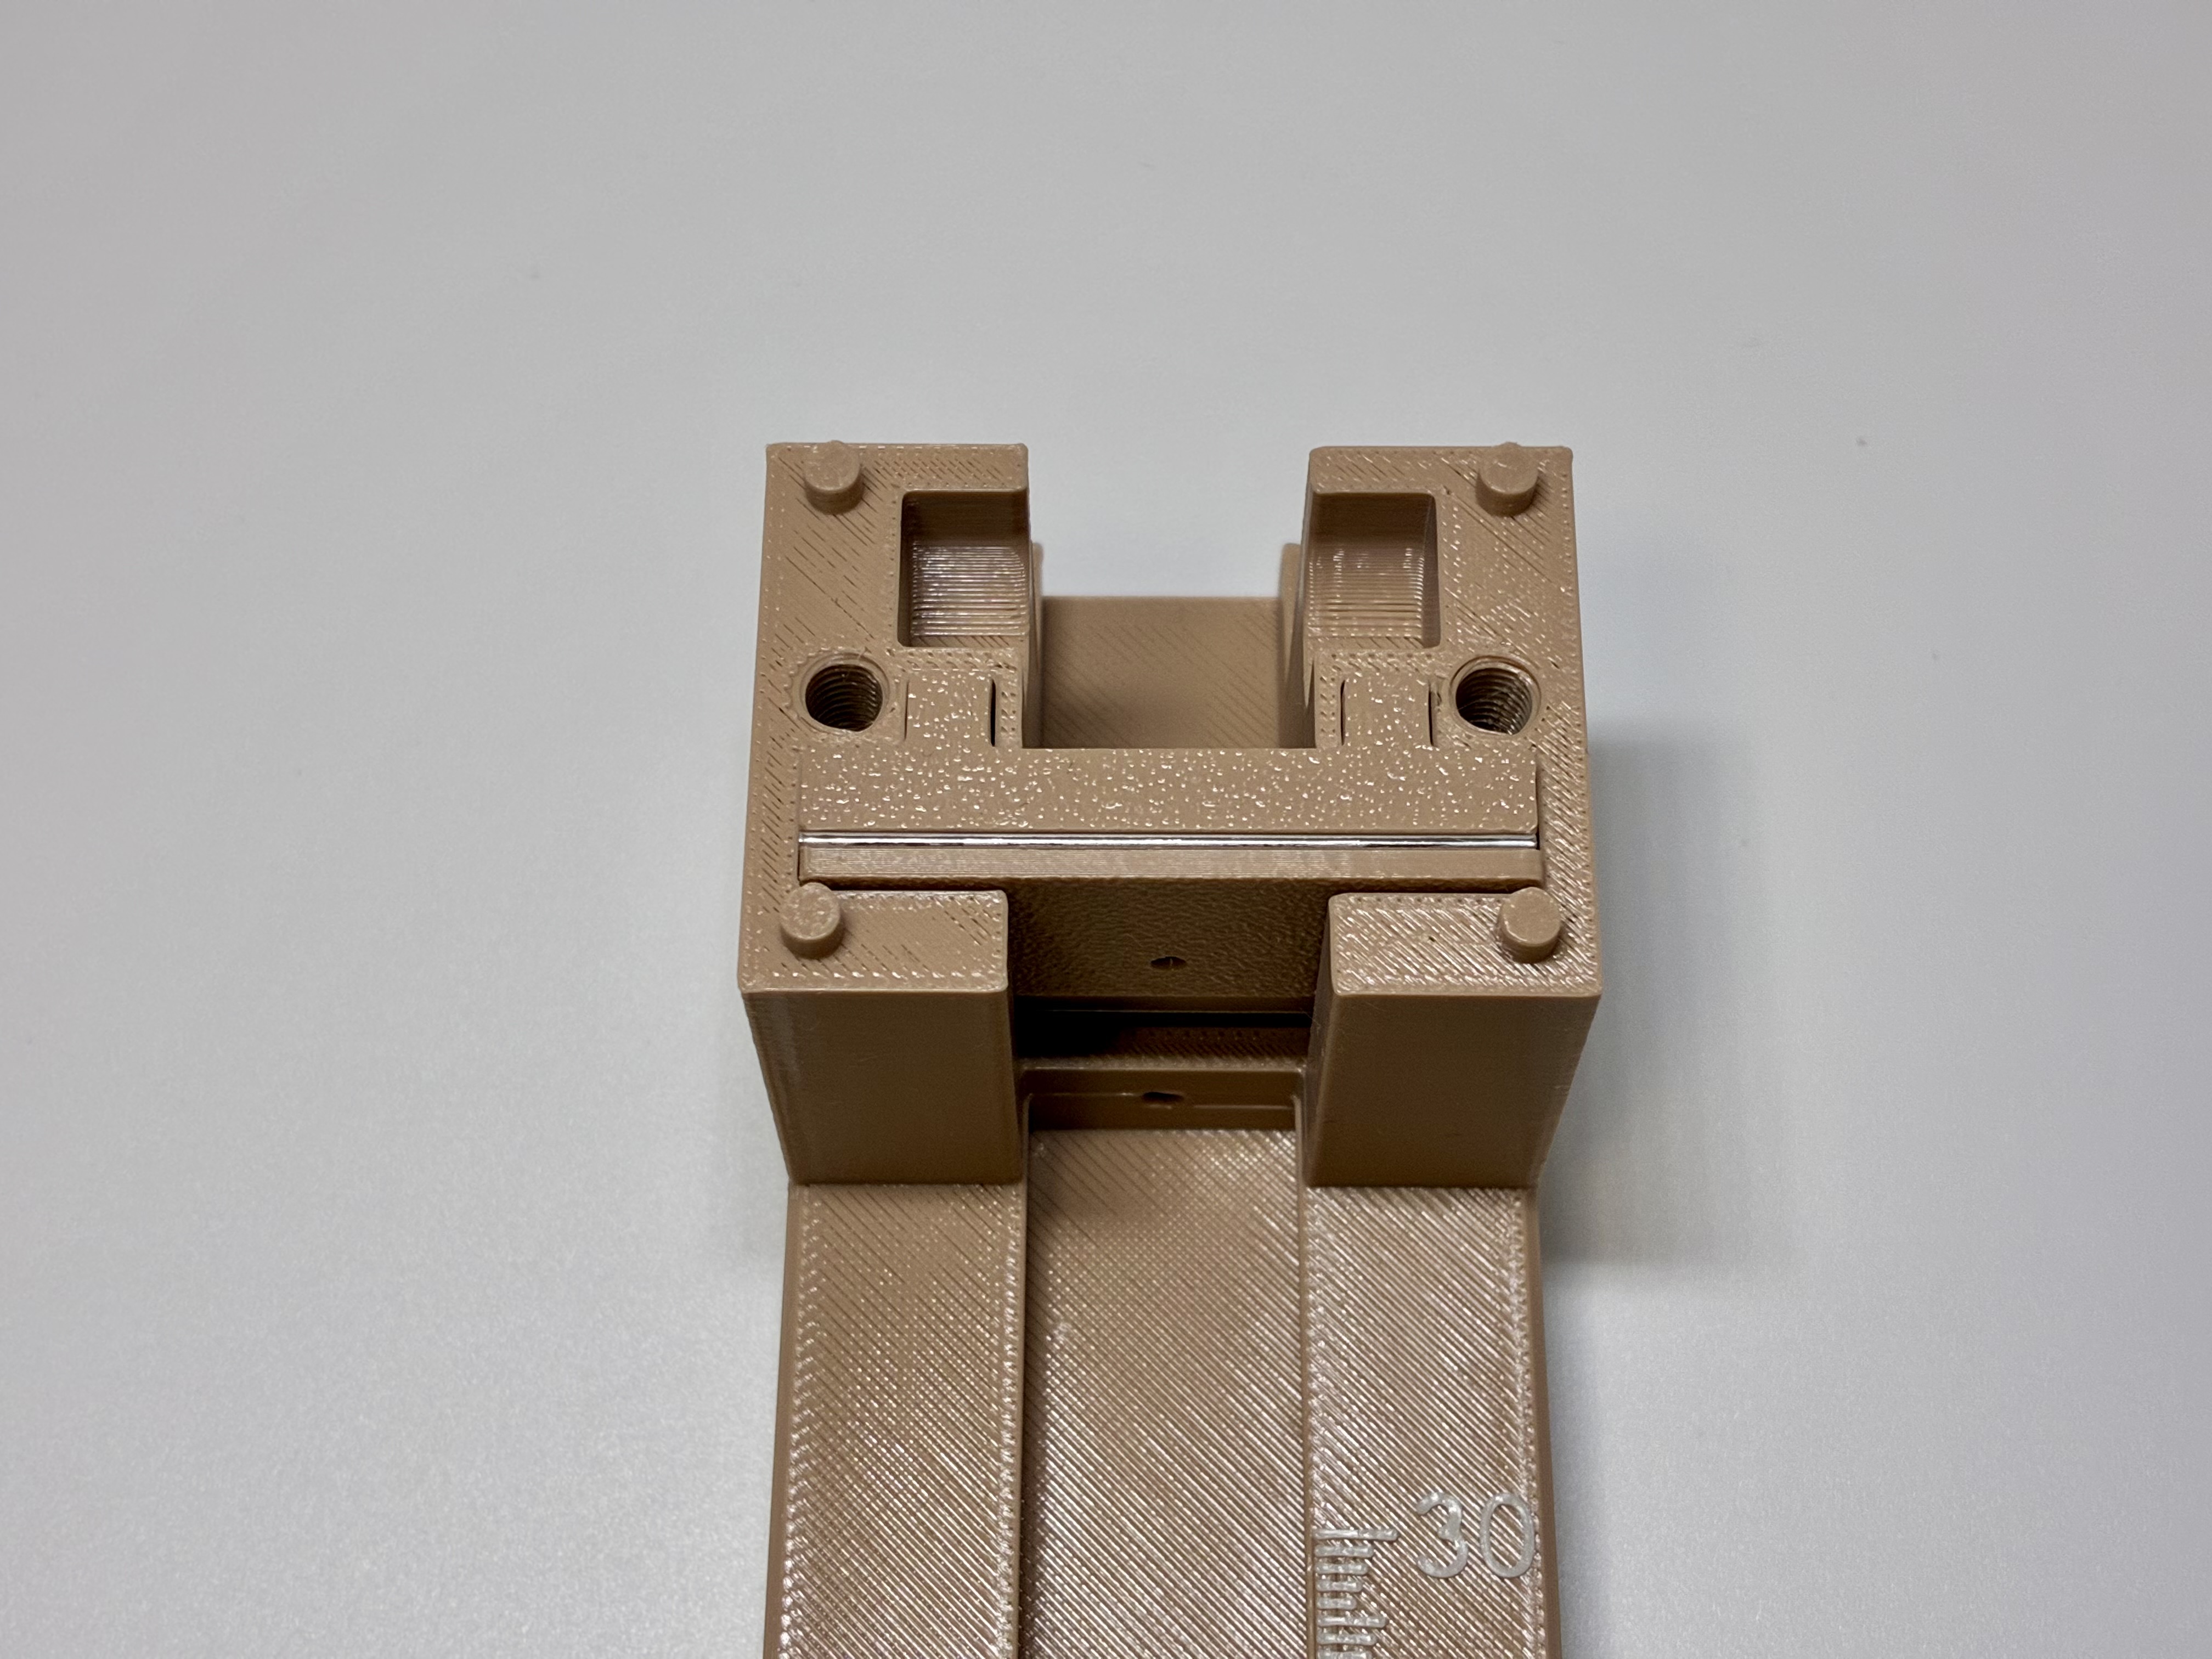
Select the two springs and put them into the spring slots on the main body.
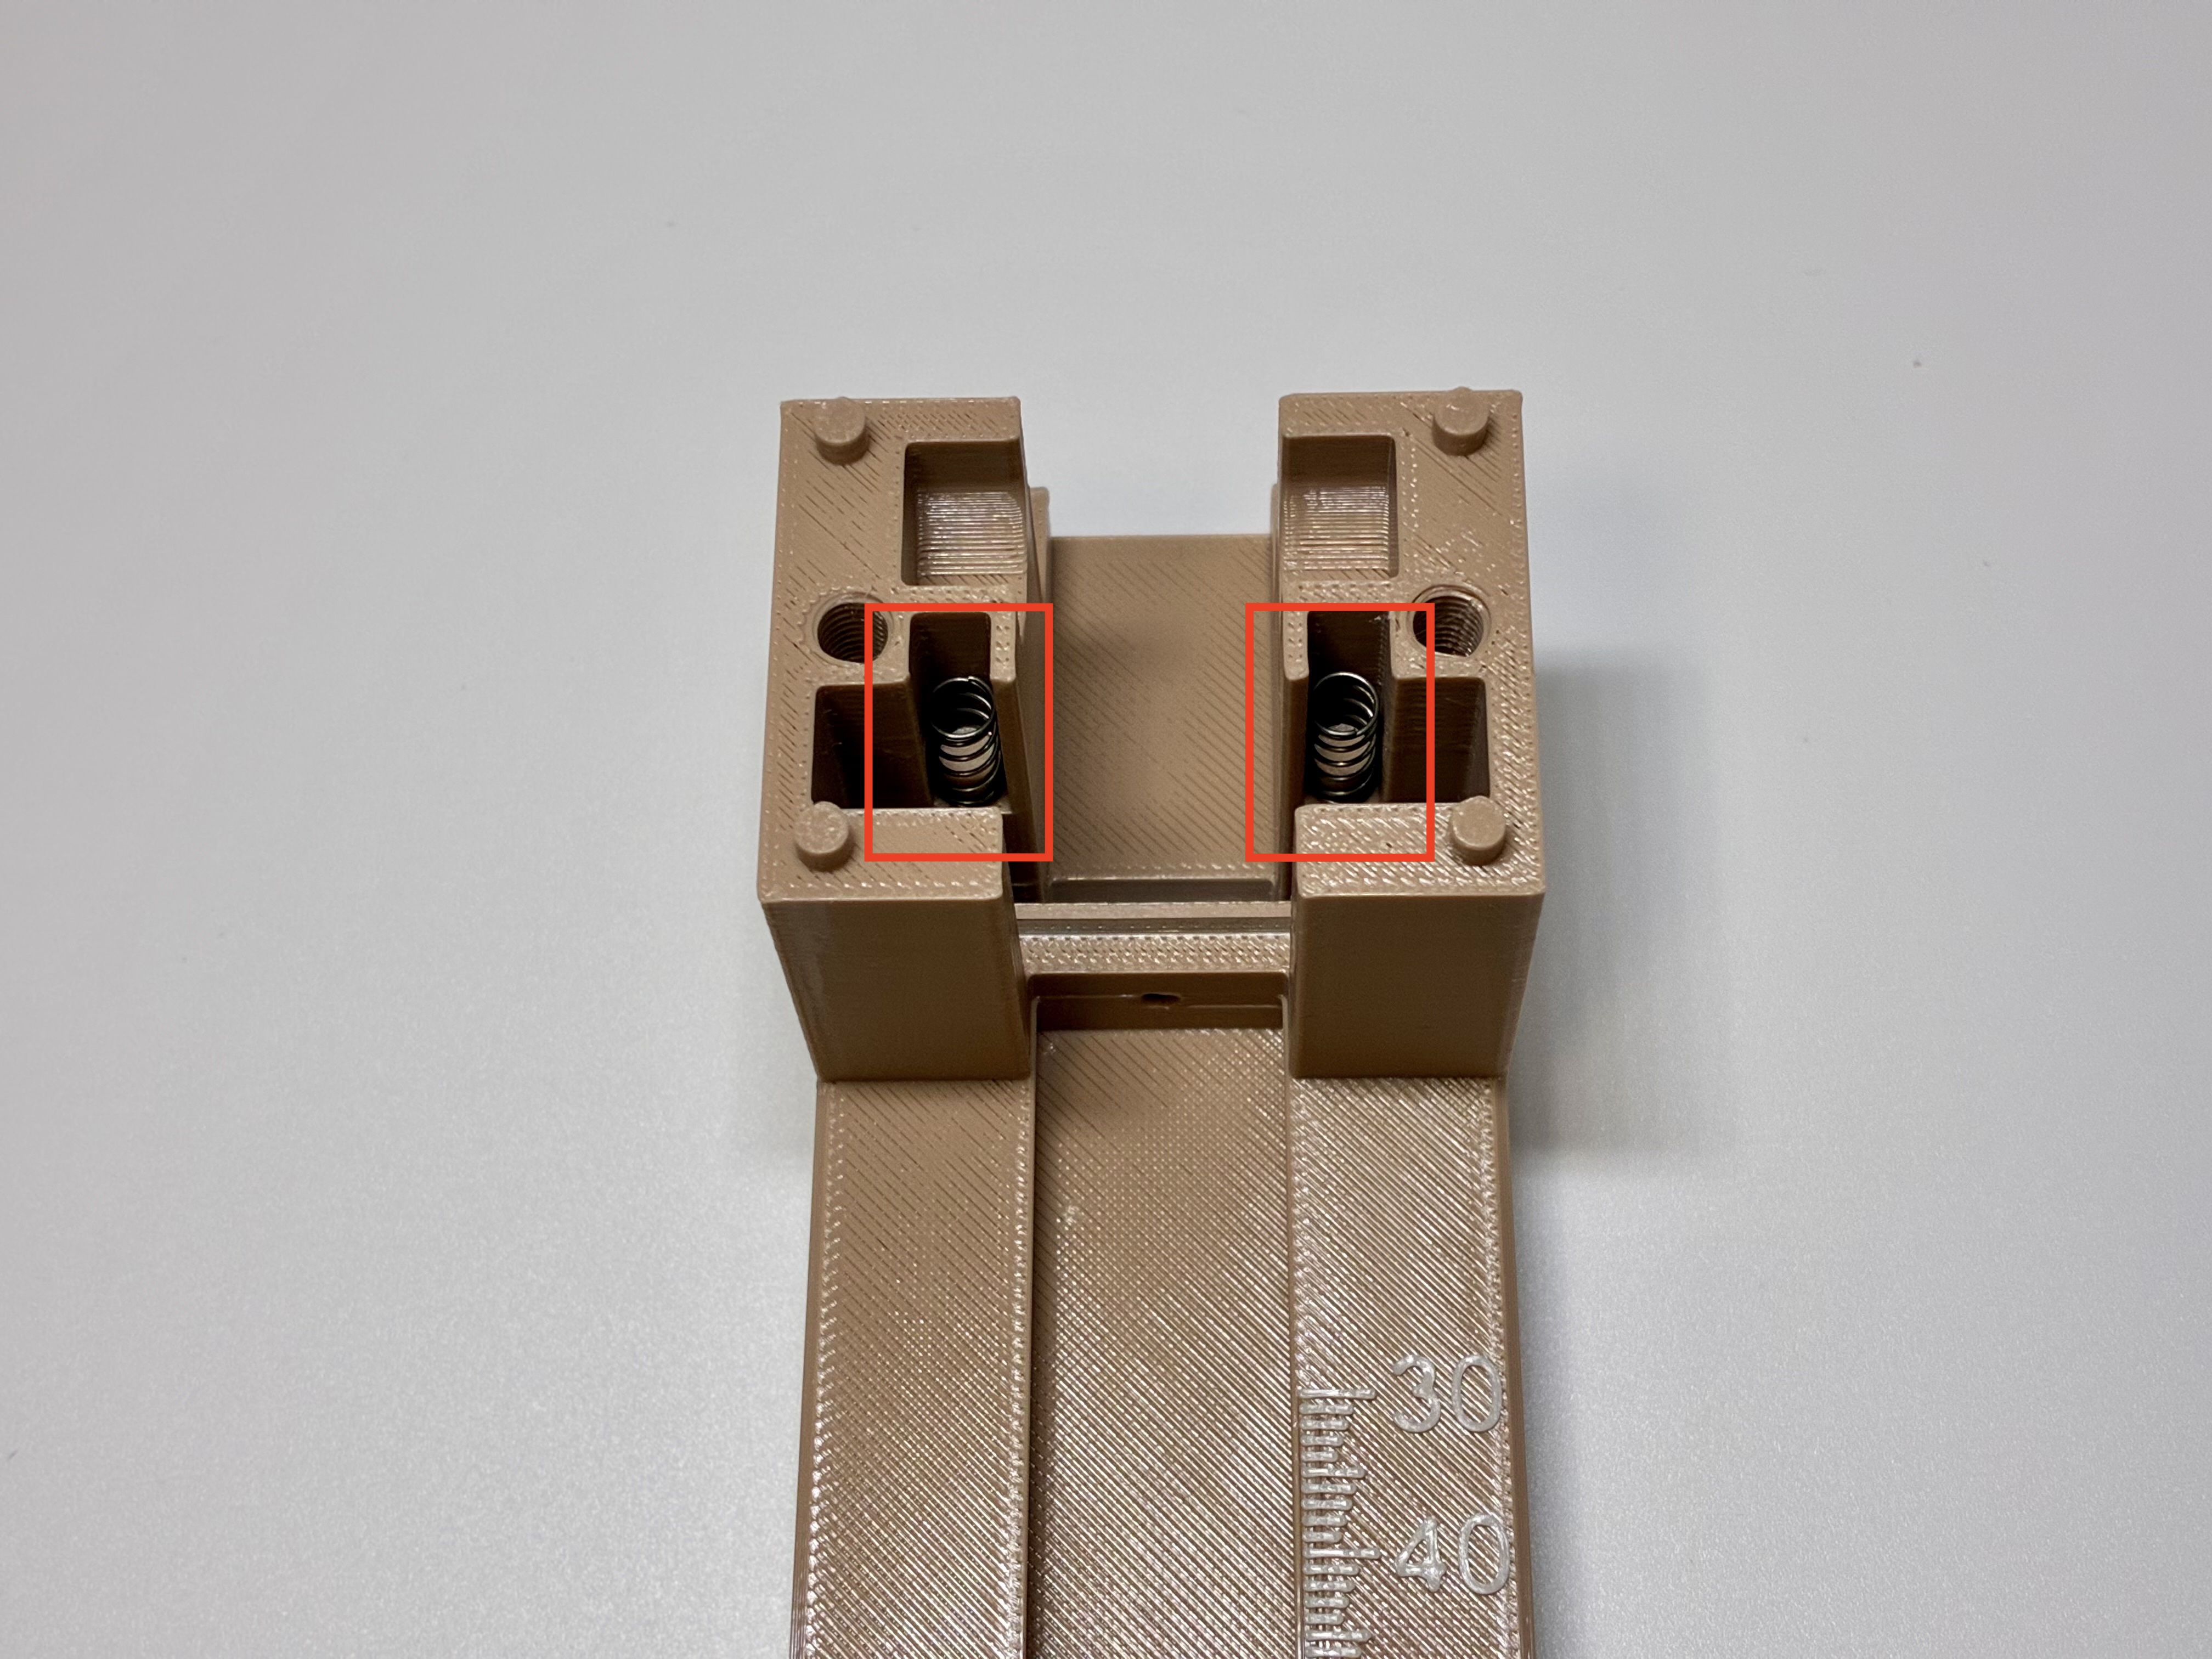
Put the top blade holder into the blade slot on the main body. If the movement of the blade holder is too tight, you can consider increasing upper_blade_holder_width_tolerance, upper_blade_holder_slot_tolerance, and blade_length_tolerance to make it looser. Please refer to the github repository for more information.
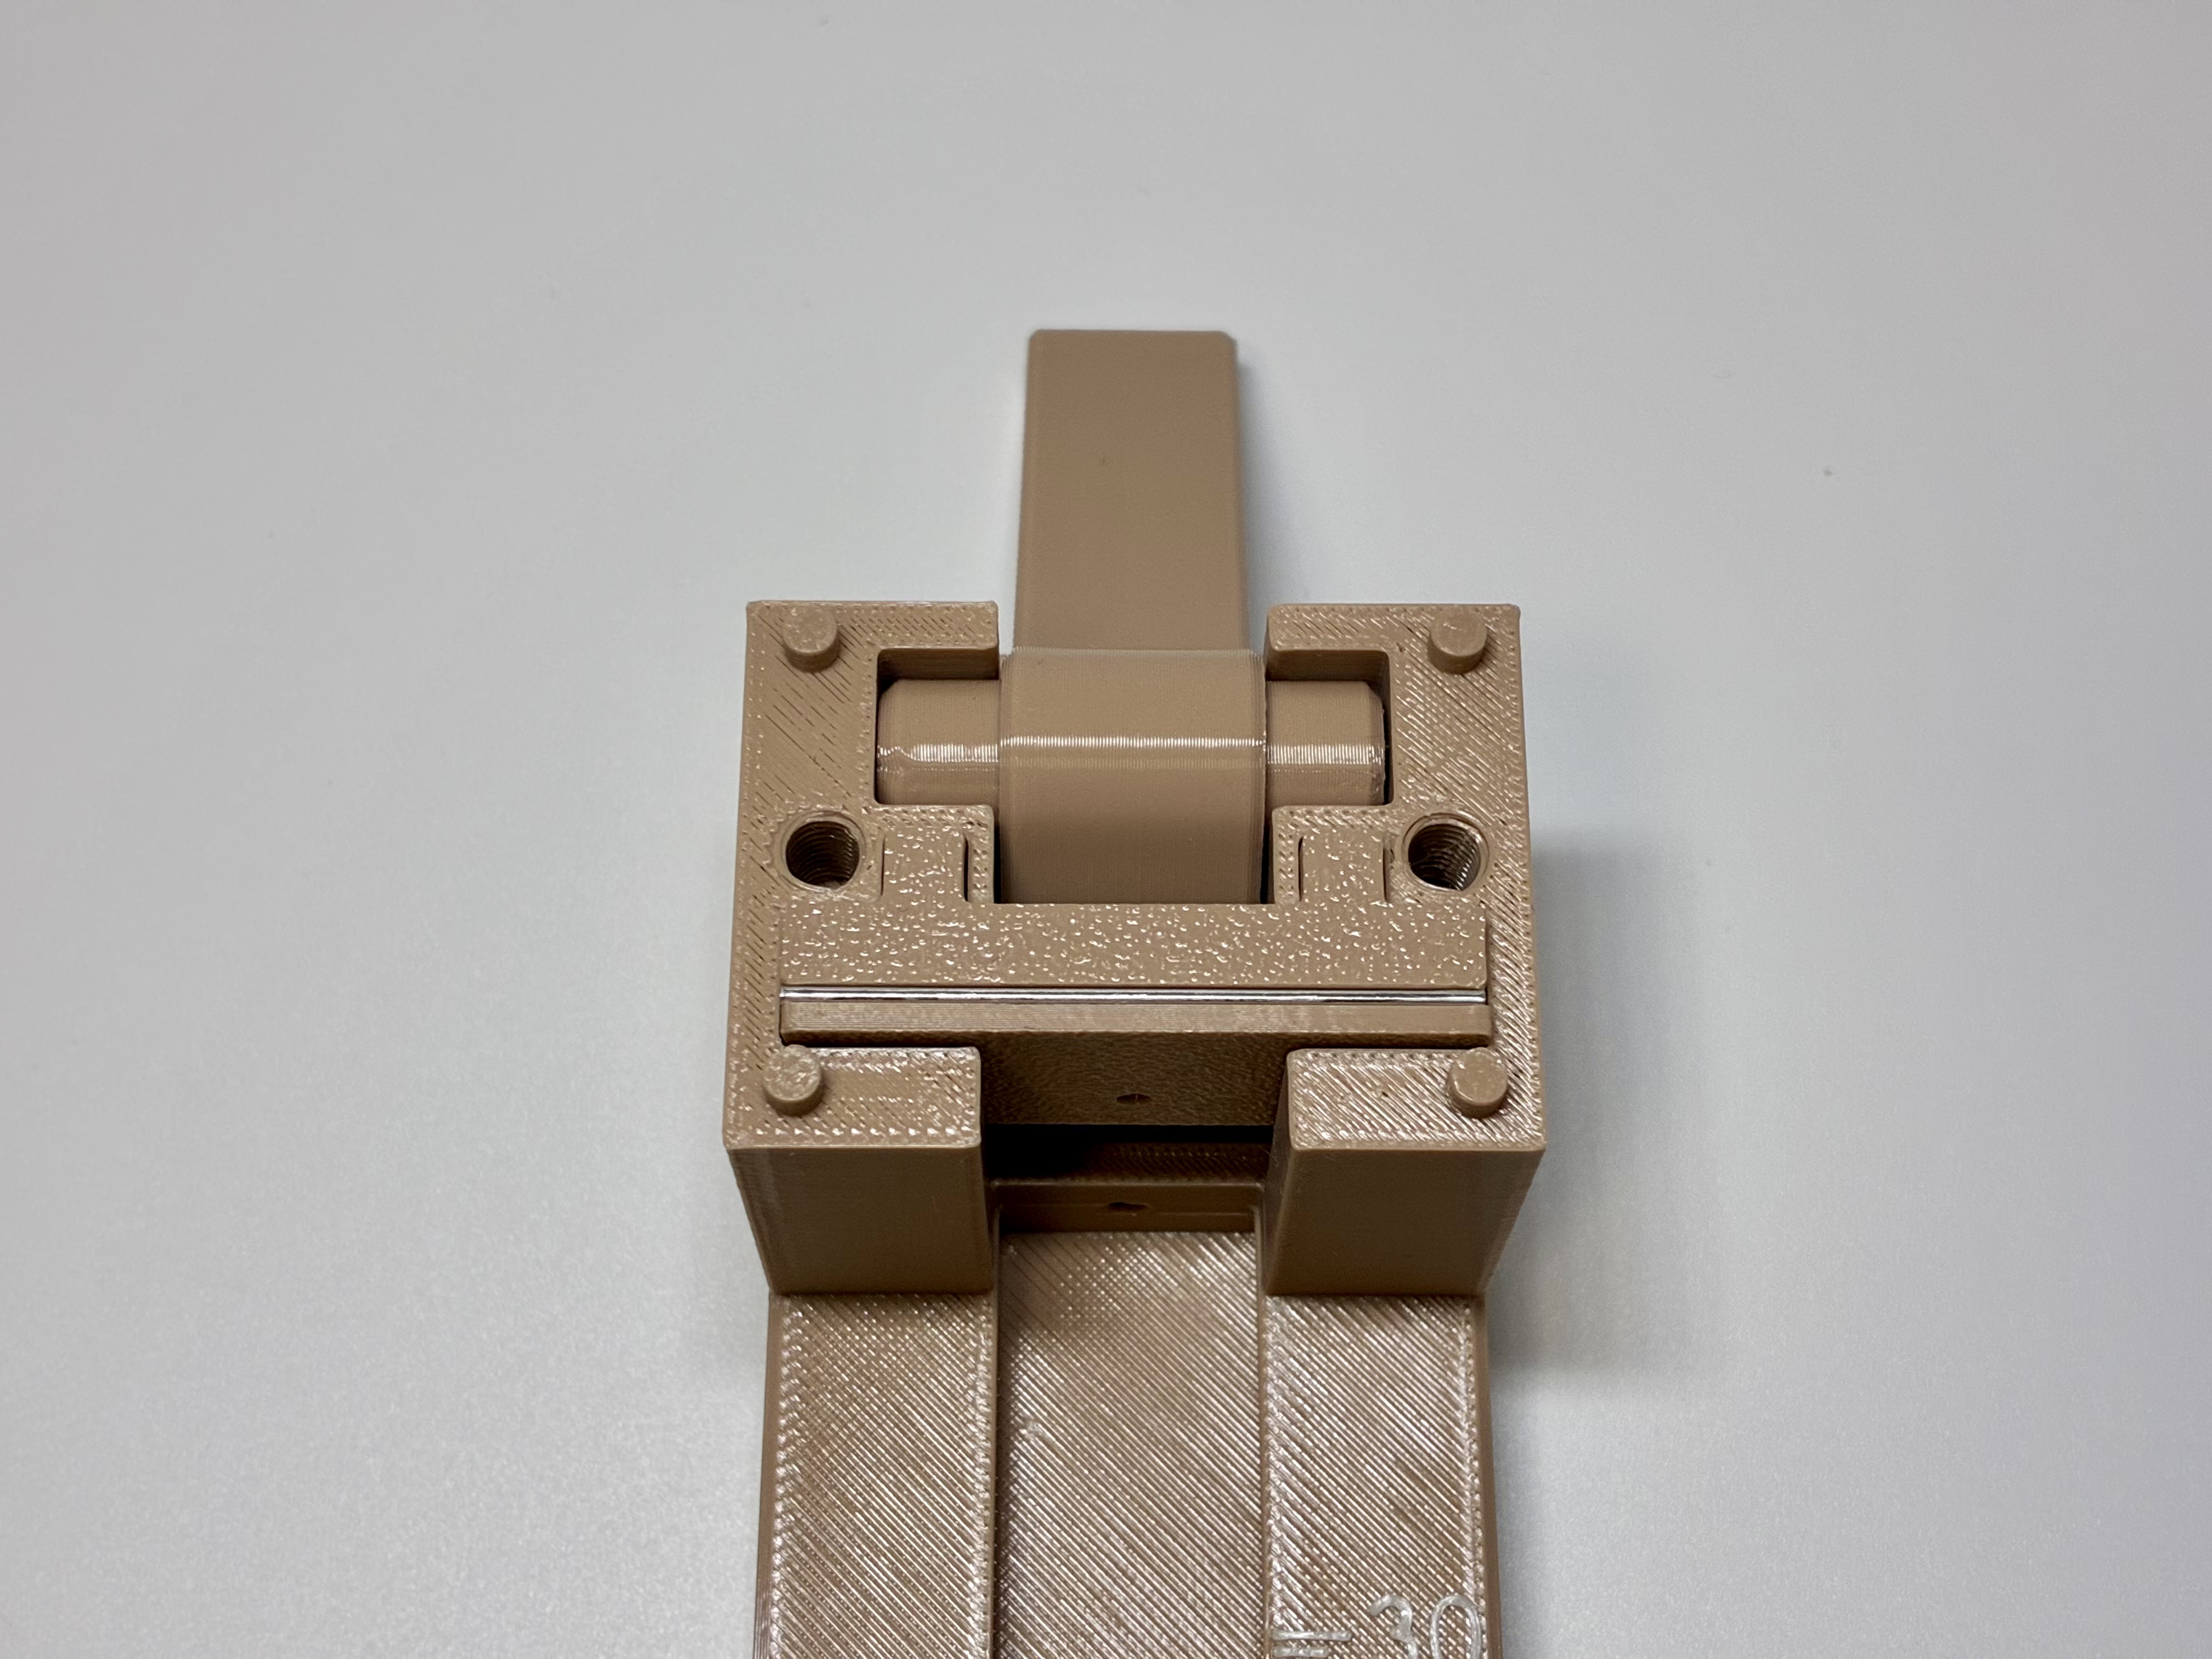
Put the handle axle through the holes on the handle, and put them into the axle slot on the main body.
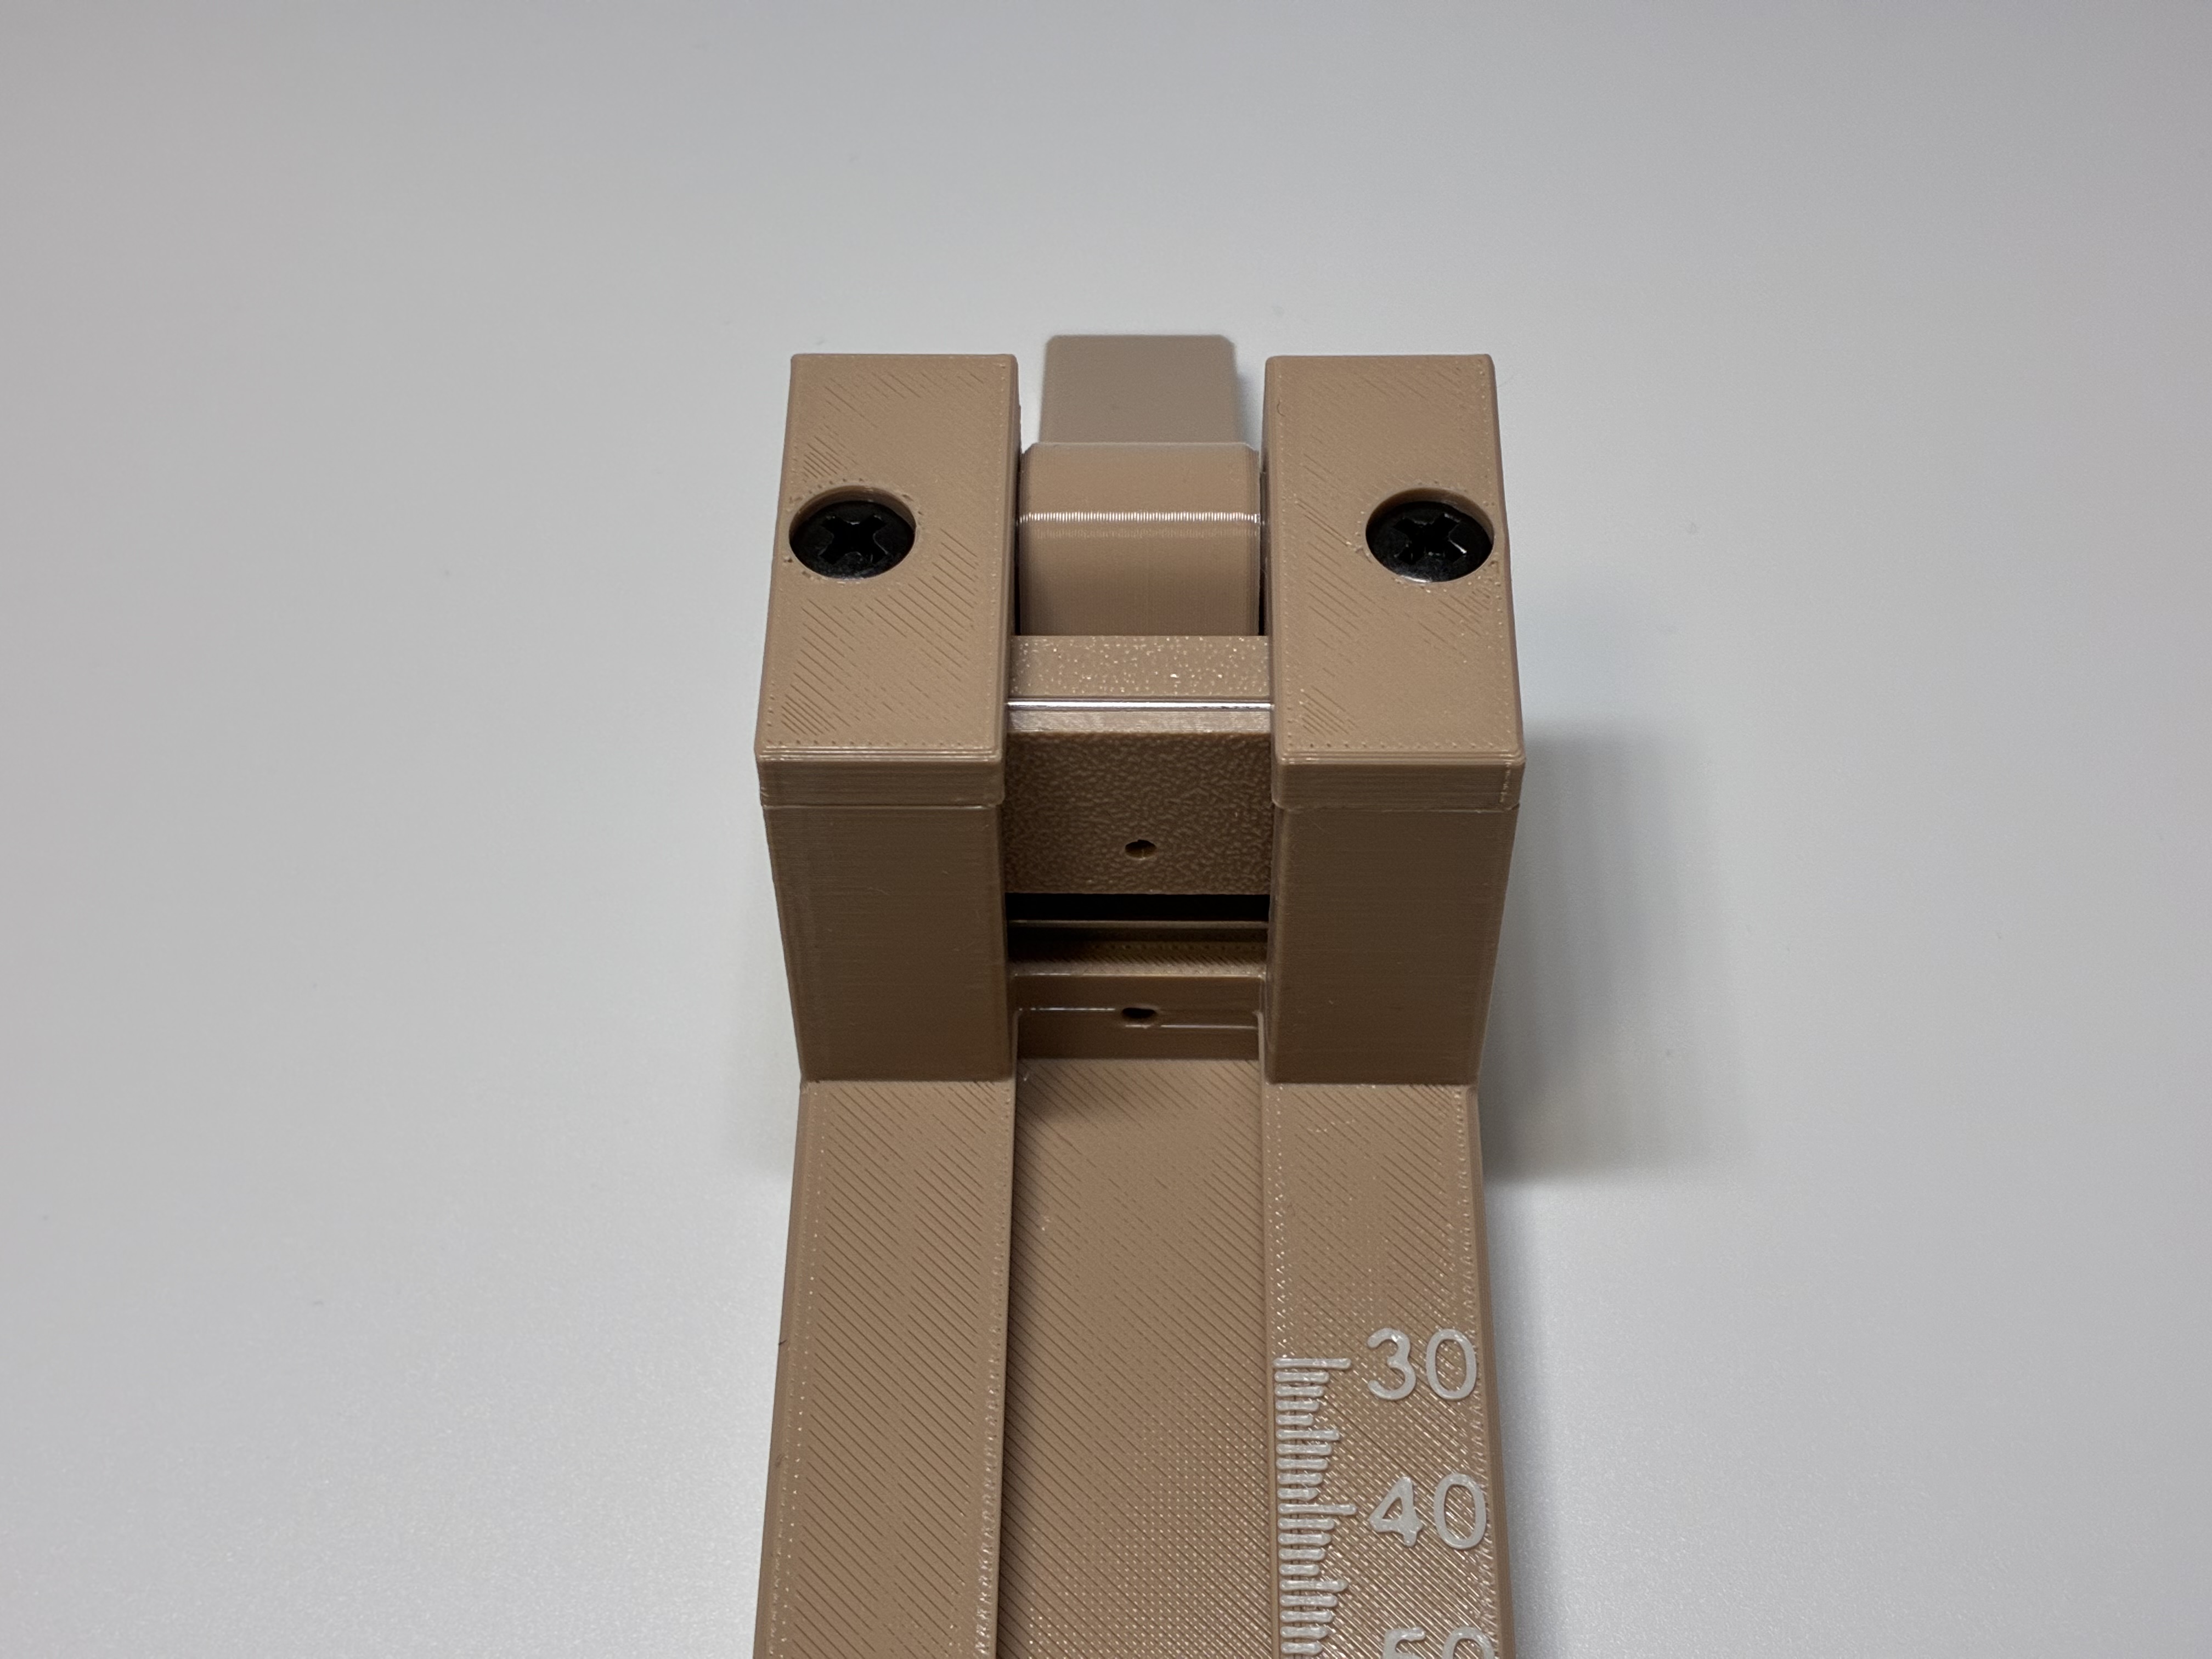
Put the left lid and the right lid onto the main body, and secure them with M5*10mm screws.
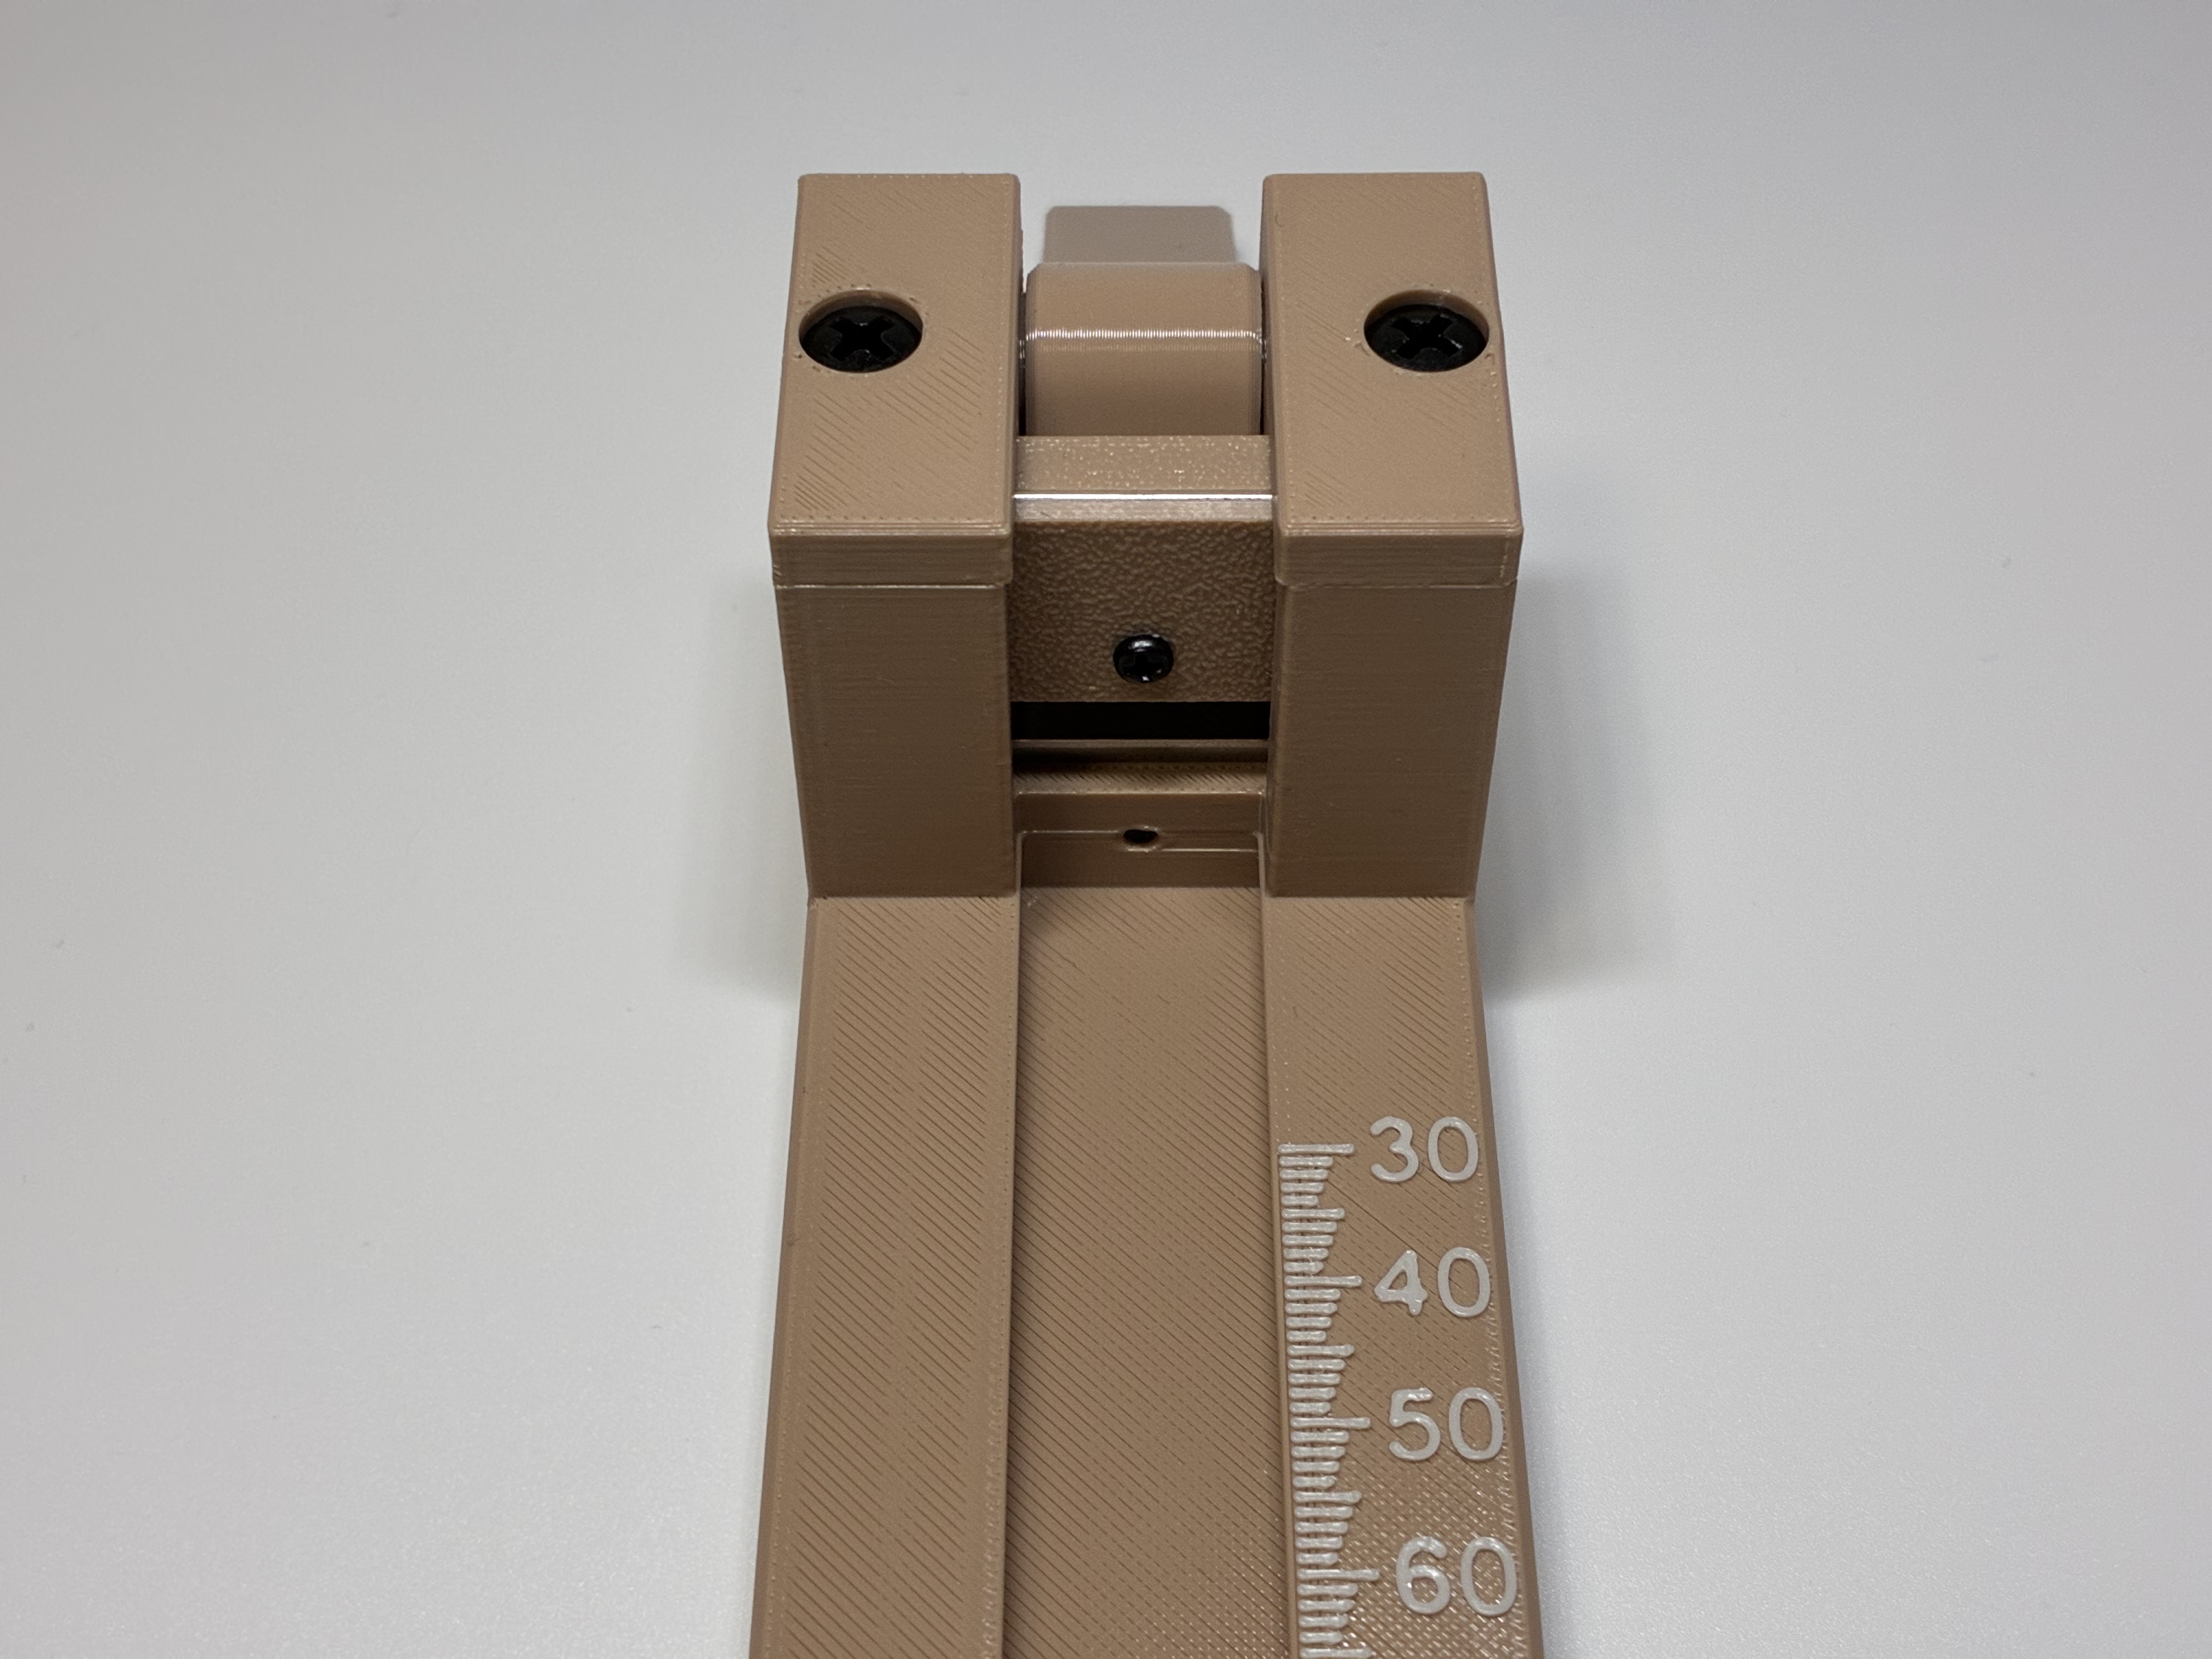
Now you can safely secure the top blade holder with an M2.5*5mm screw. 😊
Step 4: Install the Reed Holder
Remove the support material from the reed holder. The image below shows the reed holder that has been removed of the support material.
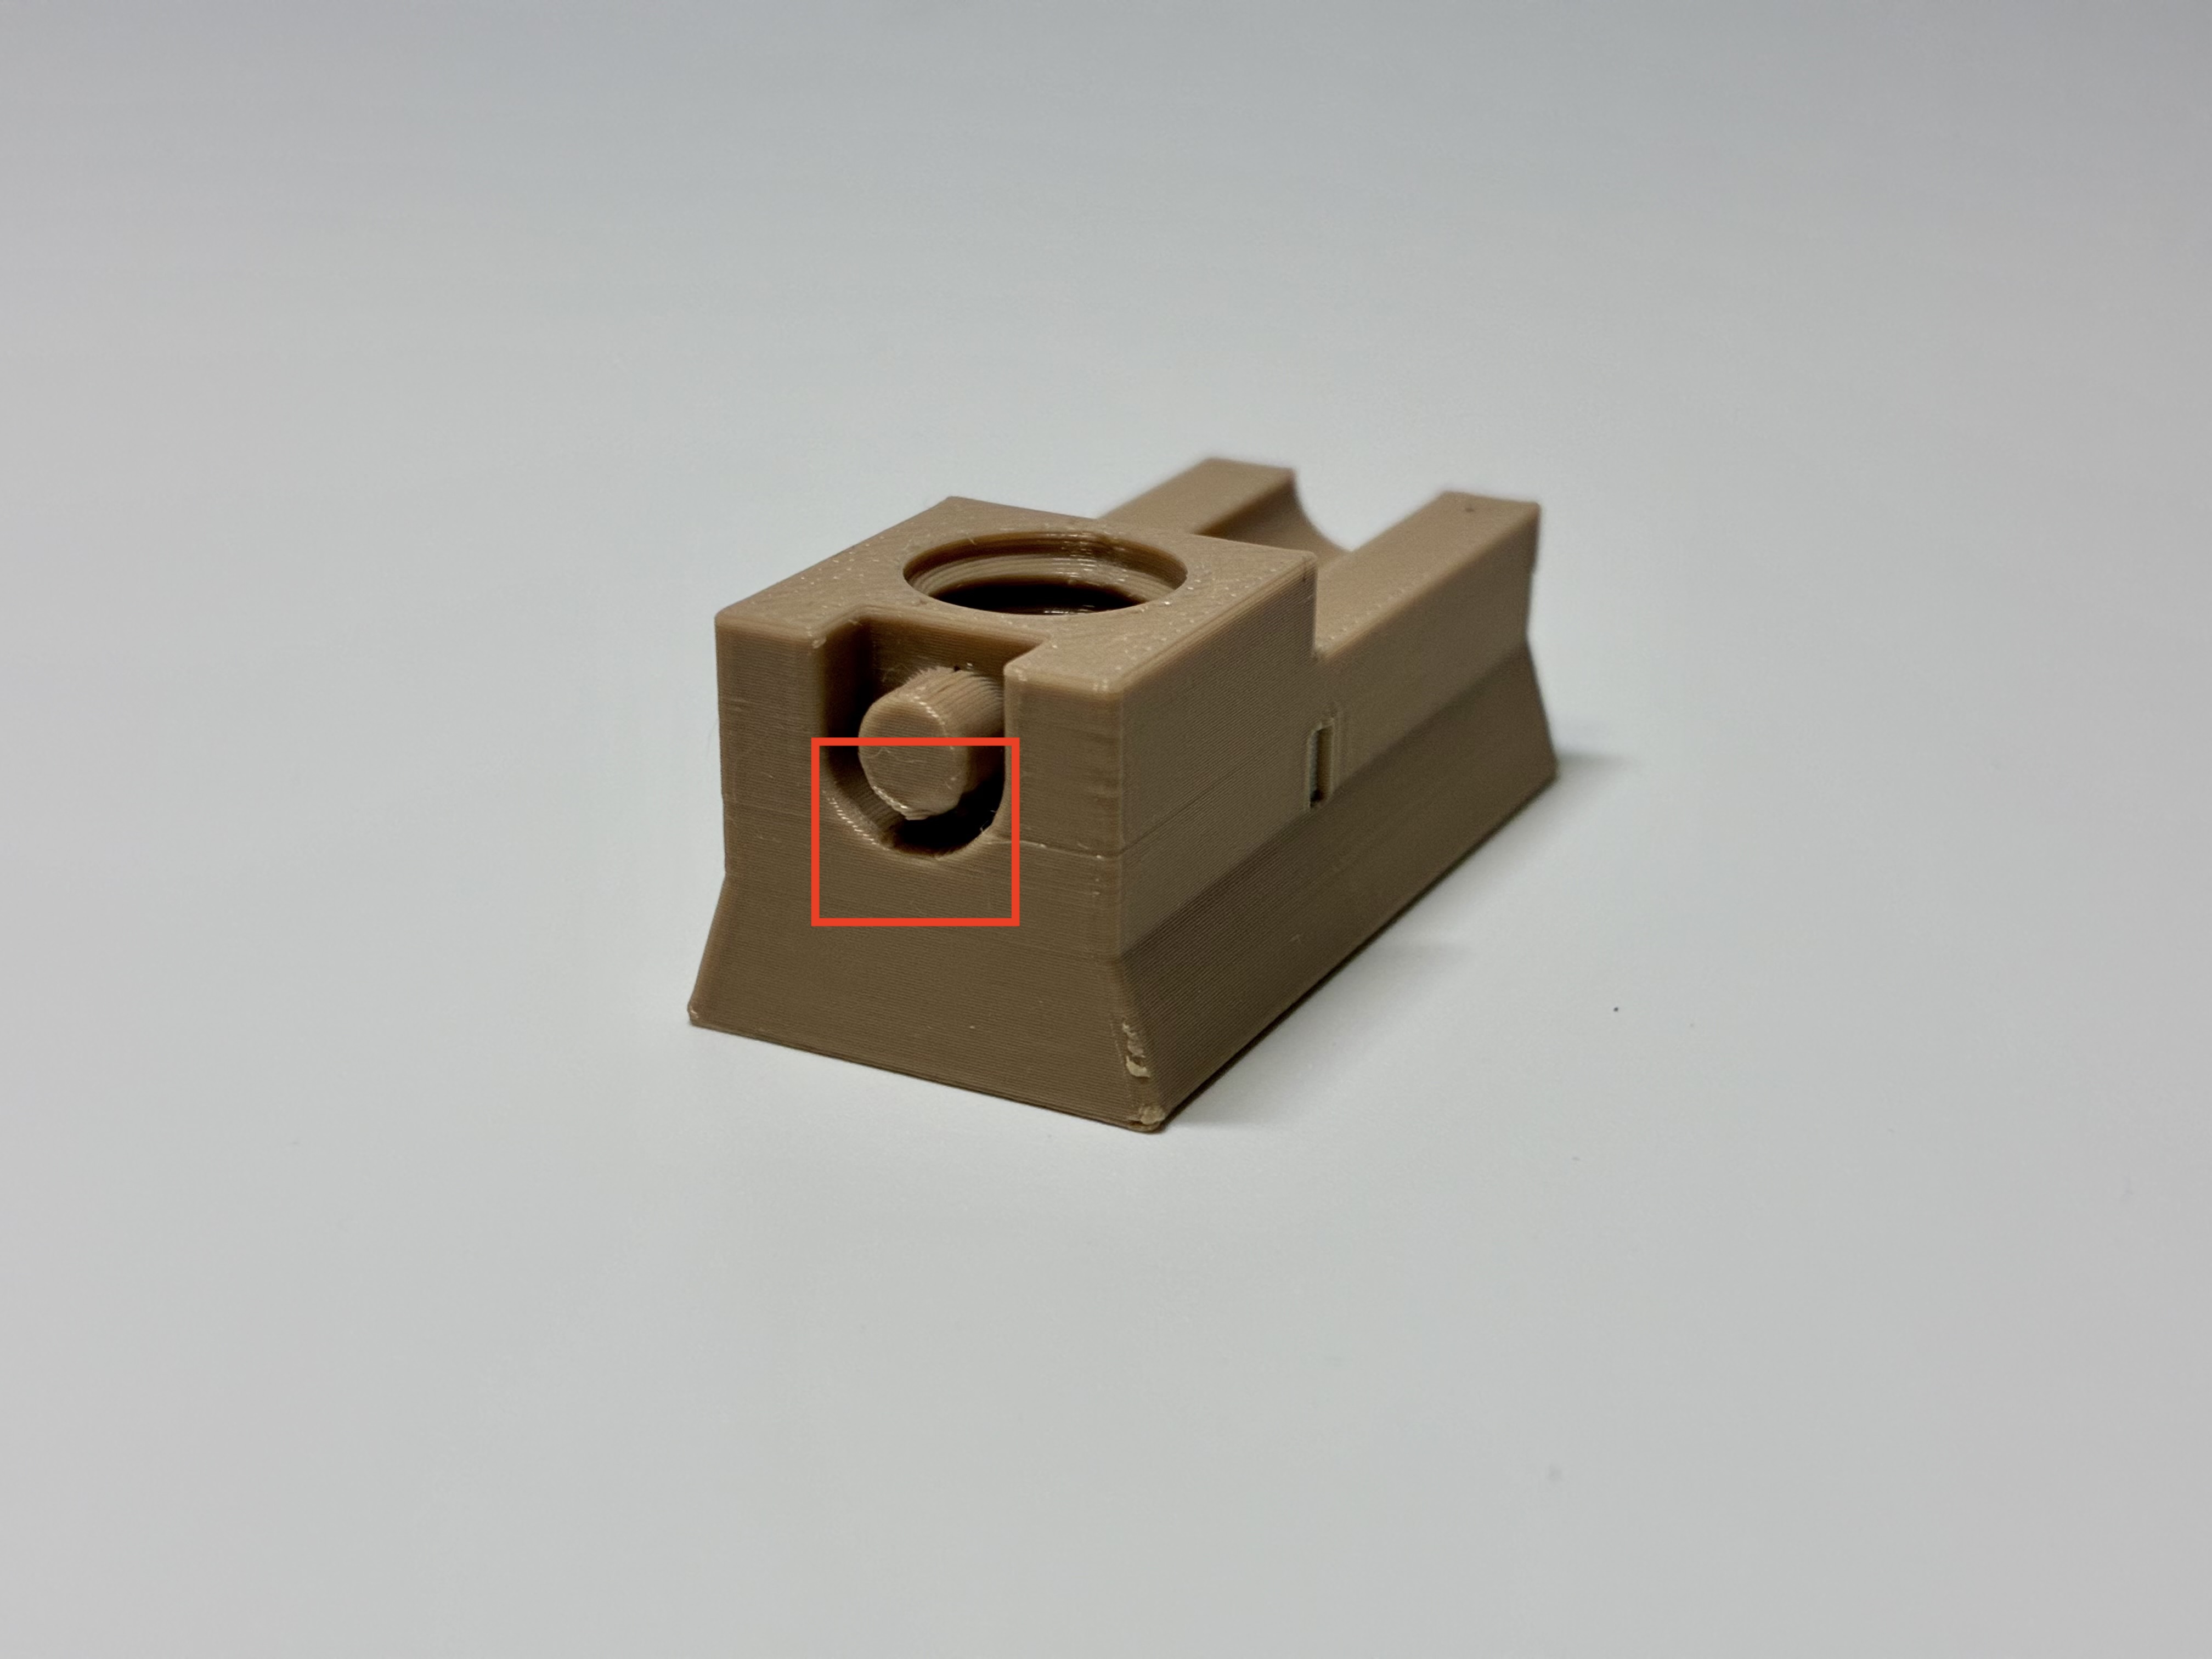
Screw the reed holder screw into the reed holder, and put the reed holder into the slot on the main body. When cutting your reeds, tighten the reed holder screw to secure the reed holder in place, and loosen it when you want to adjust the position of the reed holder.
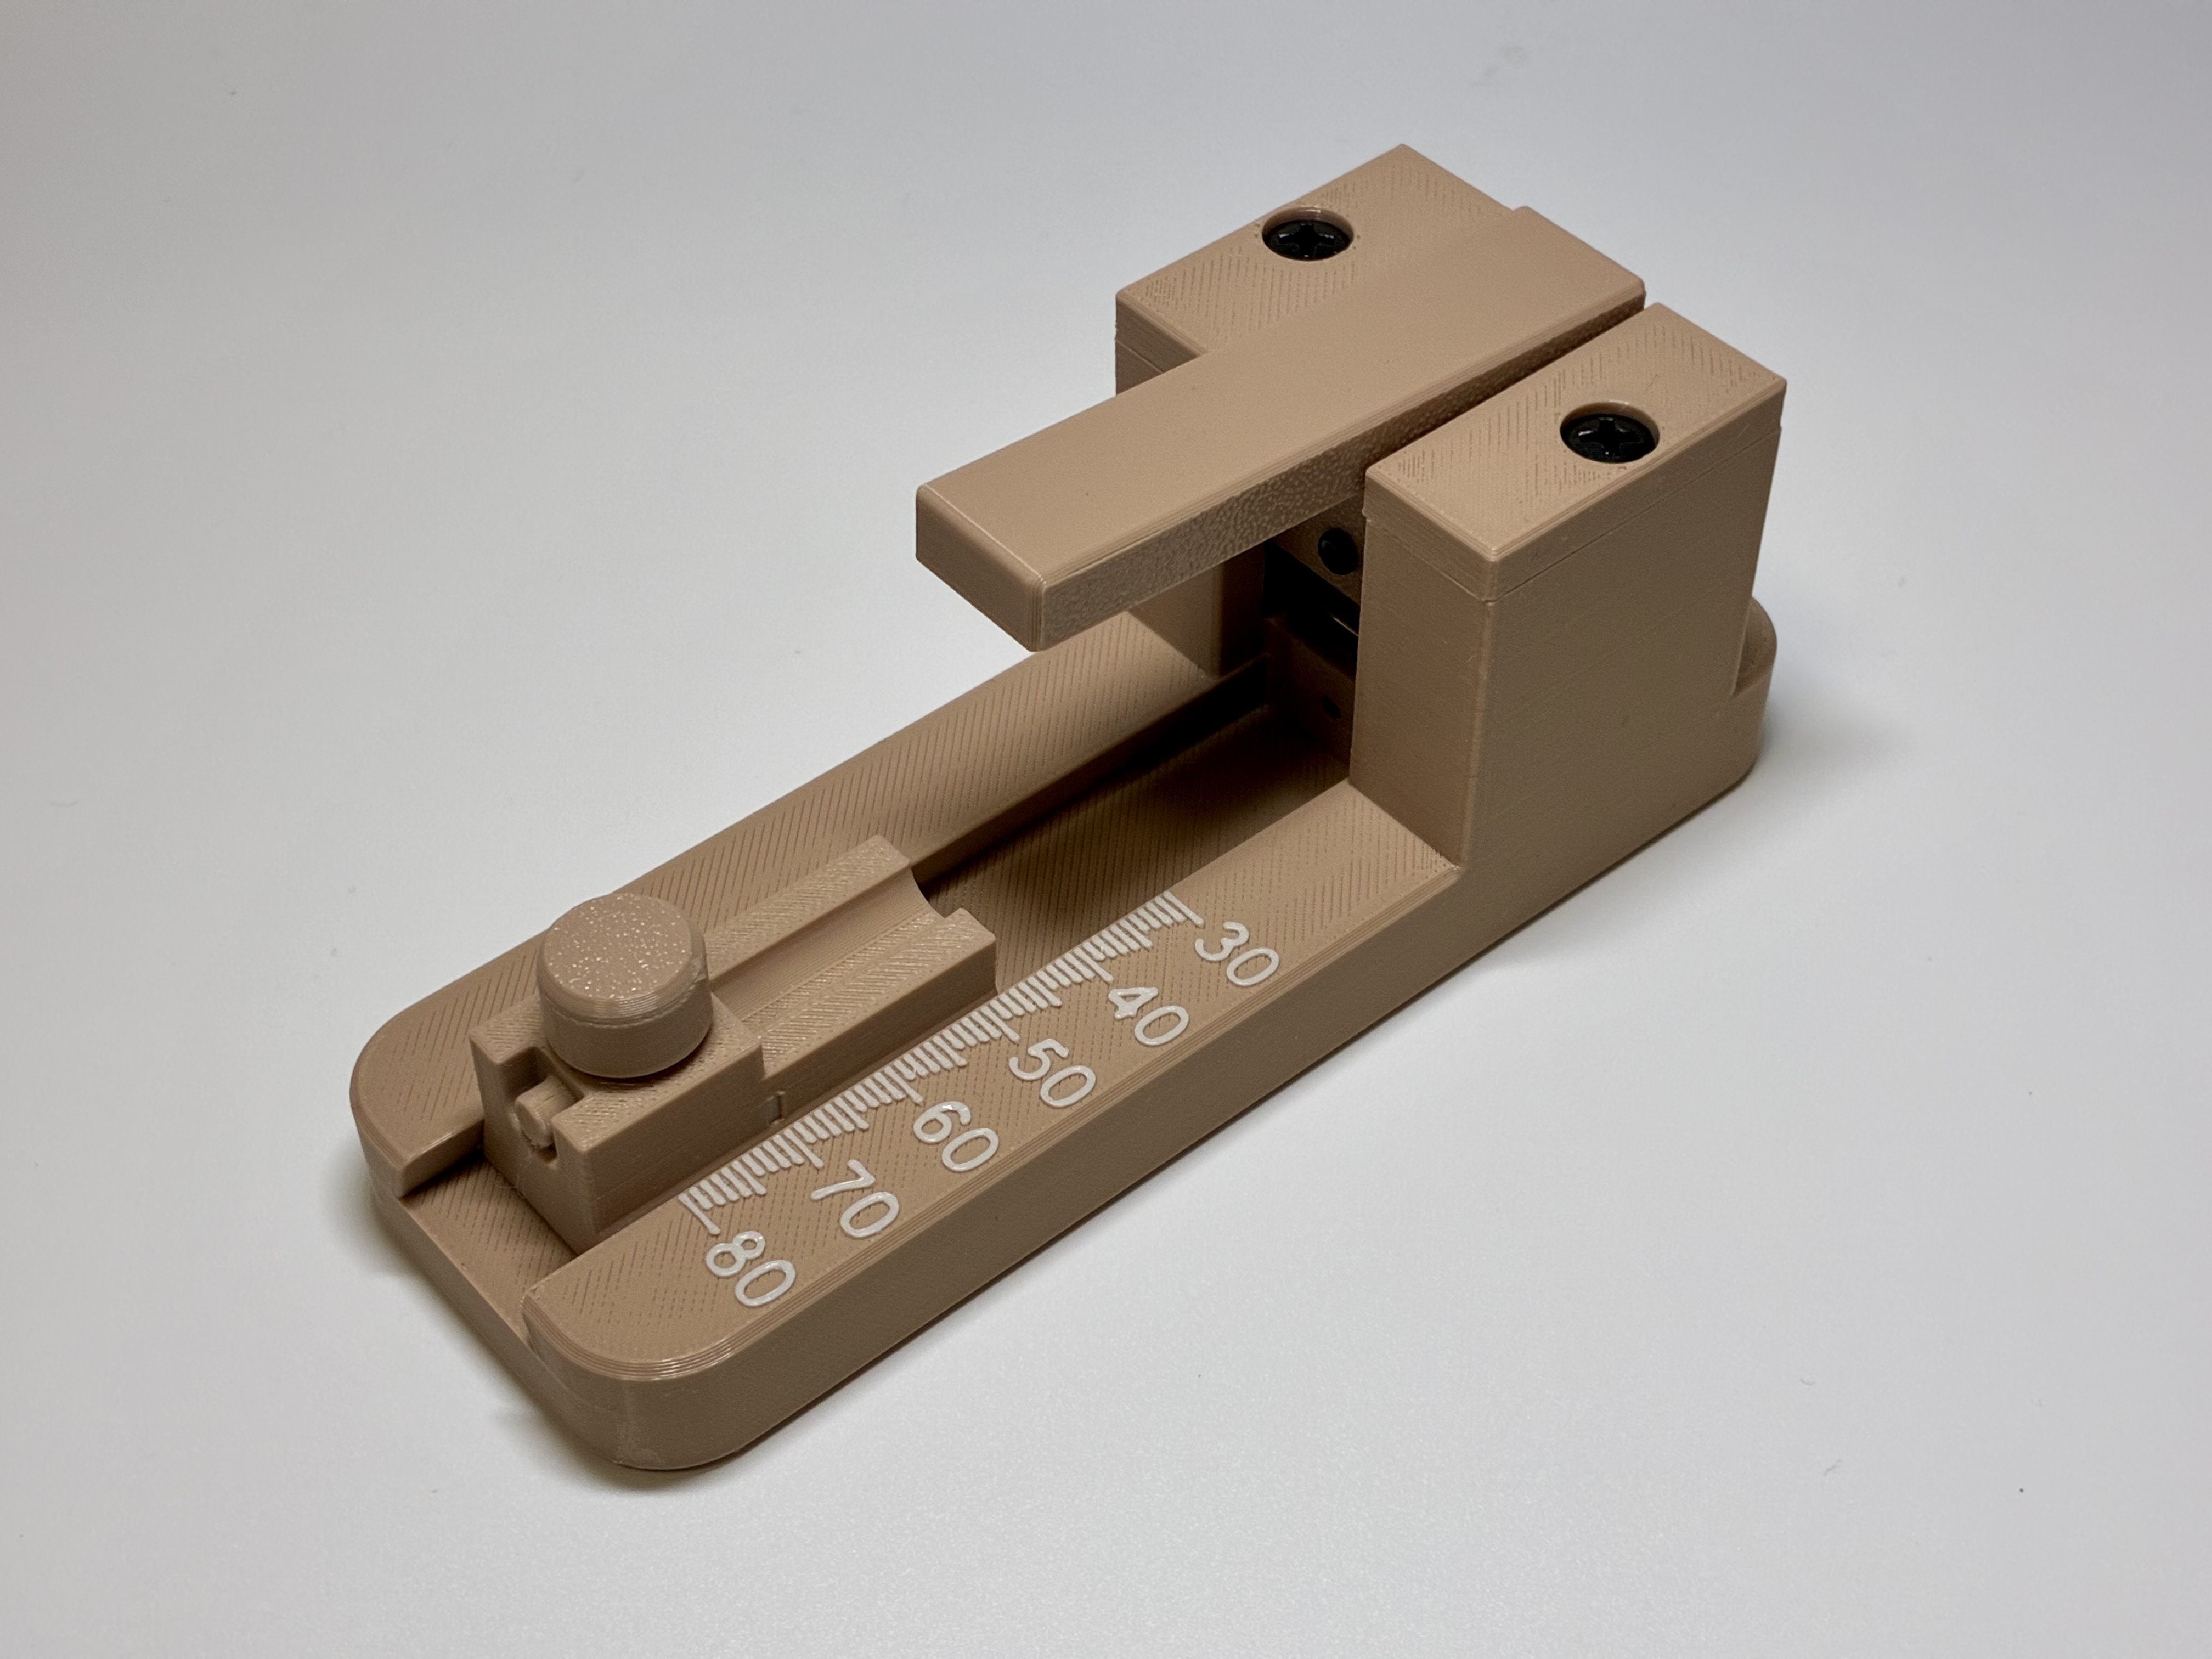
Your reed guillotine is now fully assembled and ready for use! 😃
Usage Guide
Adjust the cutting length according to the scale marking on the side of the reed holder. The procedure is similar when using the other side of the reed holder, which is primarily designed for English horn reeds. 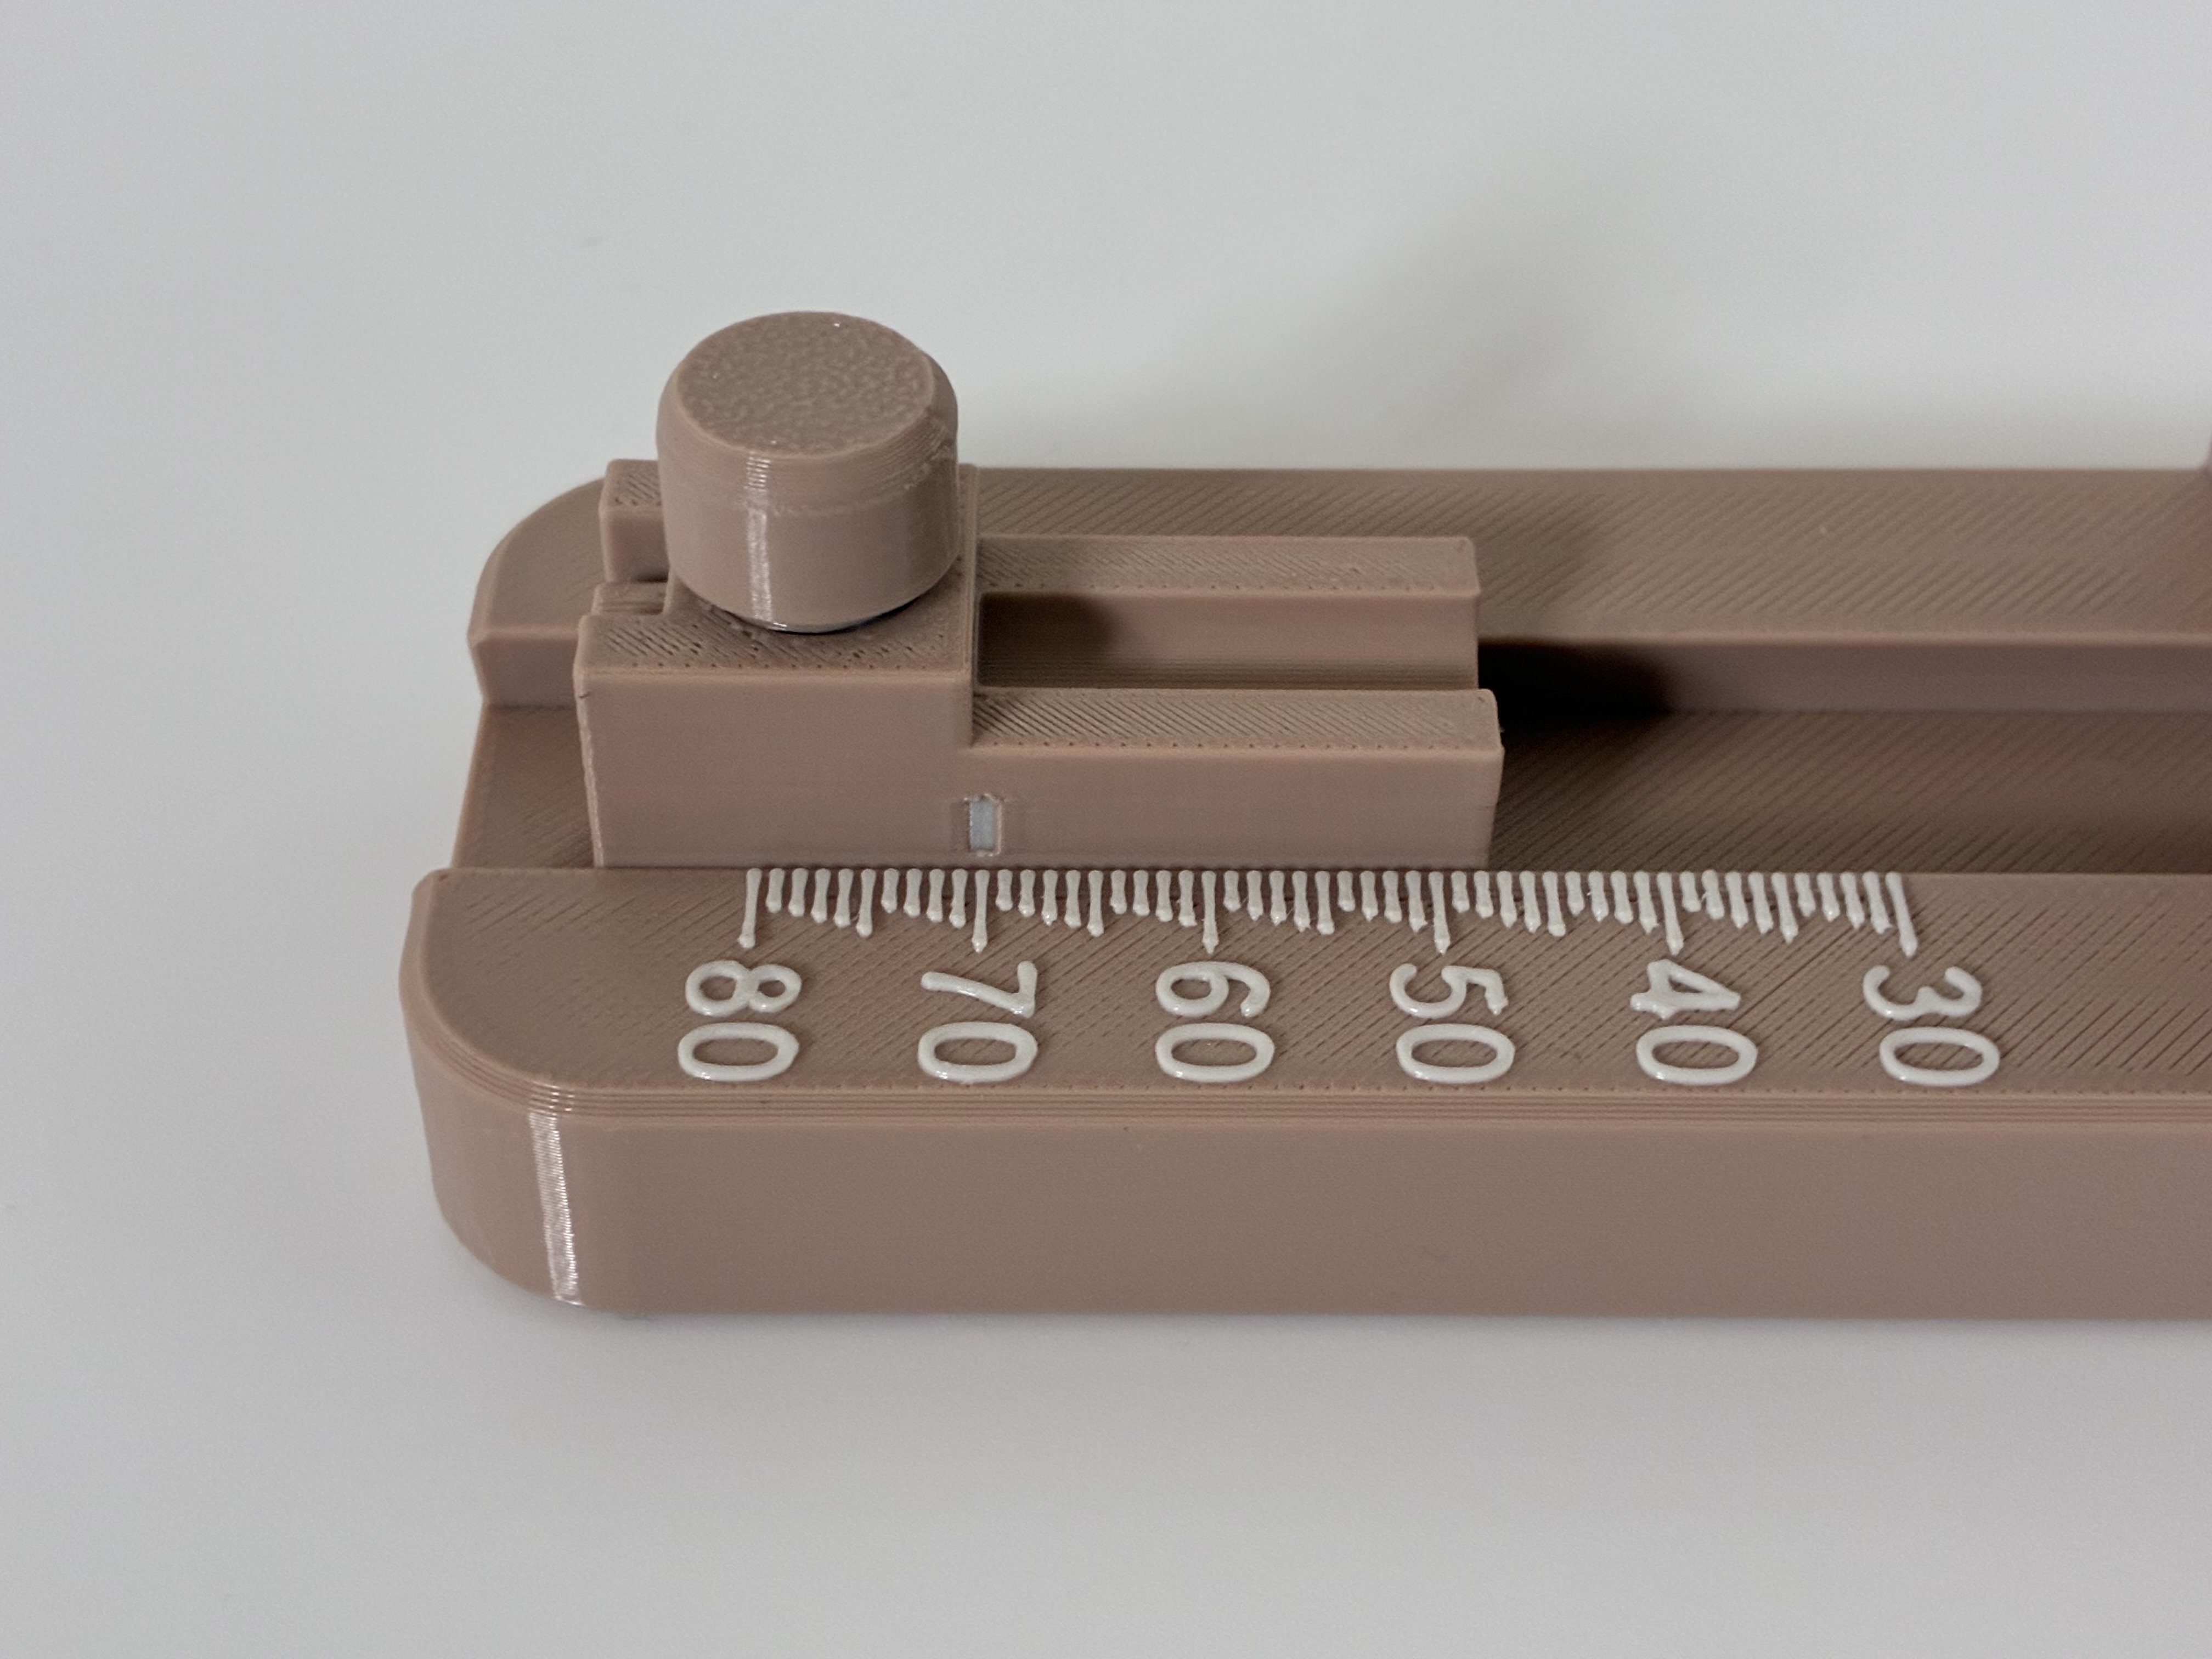
Place the reed in the reed slot and use the handle to cut the reed. 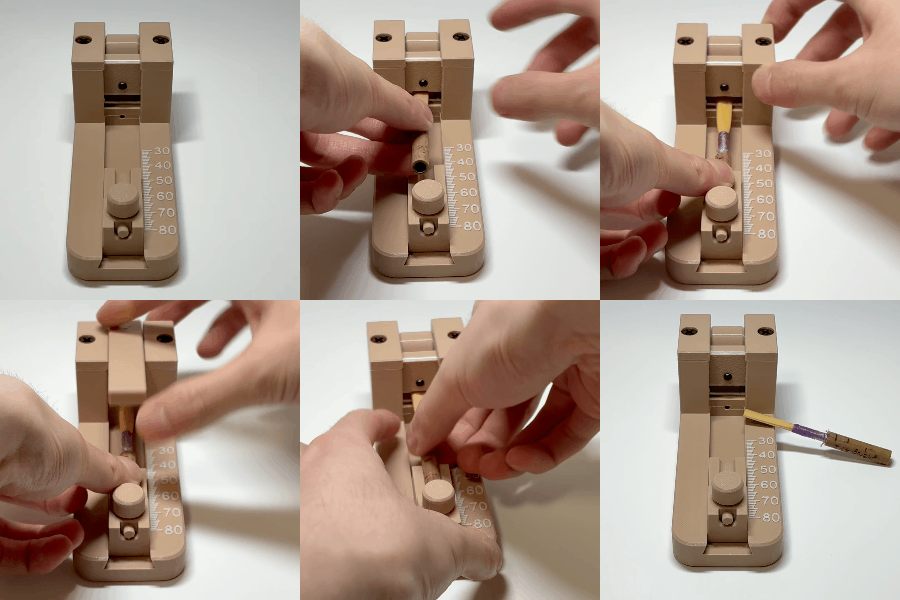
If the scale is not accurate, adjust scale_tolerance to finetune it. Increasing scale_tolerance will result in a longer reed, while decreasing it will result in a shorter reed. Please refer to the github repository for more information.